
Implementing OWA for Internal and External User Access
Start Free TrialThis guide, written by an expert in the field, explains how to provide externally controlled access to OWA for users based on Restrictive Windows Groups while allowing all users to connect internally. Particular consideration is given to security and client access and how to configure a Kemp LoadMaster with the Edge Security Pack (ESP) for this environment. This approach ensures that no significant changes need to be made to existing Exchange infrastructure.
Detailed instructions provide a clear roadmap for configuring two RADIUS based Single Sign On (SSO) authentication domains within the LoadMaster, plus the subsequent steps to configure and test internal and external user access.
Design Considerations
Several design models were taken into account for this request, however security is of the utmost concern so easy things like direct connection from the DMZ into the internal LAN were skipped although they would probably still be considered secure.
Infrastructure Requirements
- A reverse proxy solution in the DMZ; This paper describes the use of Microsoft TMG 2010 (SP2) for this scenario, however now that the Threat Management Gateway has transitioned to an extended support phase, Kemp recommends use of the LoadMaster with Edge Security Pack as described in the Kemp ESP Page.
- Kemp Load balancer ver 7.1-24b, ESP Security Package
- 2x Windows 2003/2008 RADIUS Servers
- RADIUS Policies setup and configured for 2 separate servers.
Technical Challenge
Kemp ESP v2 does not support linked mailboxes. This document describes how to overcome that limitation..
Goal
To provide the necessary authentication and group based access control, for users who are accessing OWA from anywhere internally or externally.
Additionally OWA has to work internally and cannot be denied using options in Exchange.
Note: All
CAS services
have to pass ExCRA analyzer, and allow users access based on location and group.
Solution
The solution is described in the following steps:
- Visio Diagram Showing the Entire Process
- Configure TMG for Exchange 2010. Note: The LoadMaster can provide the Reverse Proxy Solution.
- Setup 2 Windows 2008/03 RADIUS servers
- Add RADIUS Clients
- Allowed and Denied Windows Groups (Already Configured, Not included)
- Setup 2 separate (External/Internal) RADIUS Policies
- Setup 2 VIPs for Kemp using ESP V2
- Create 2 RADIUS based SSO Auth Domain using the Kemp
- Configure Each of your 2 VIPs to connect to the External and Internal RADIUS Servers
- Client Side Testing
Visio
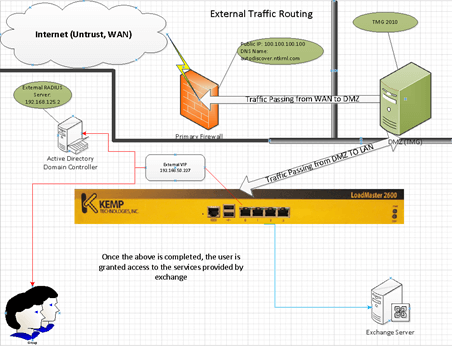
Red Showing External Traffic and Auth Routing (External RADIUS)
Blue Showing access path after Auth has been completed

Green Showing Internal Traffic
Blue Showing Access to Exchange
Step by Step
TMG Configuration
For this portion of the document we will quickly cover the Key Configuration Points of TMG. The reason why we’re using both TMG and Kemp is simply to provide additional security. TMG Itself is not required to implement this solution and should be considered optional.
You could setup the following configuration
- Internet
- WAN (Rules)
- Kemp (LAN)
- Exchange
Basic TMG Rule Set:

Showing Rules defined for my current TMG environment, your rule set may look different, you may have more rules or less rules it depends on how you configured TMG for your Environment
ActiveSync
This Rule uses the following settings:
Authentication
Since we are leveraging Kemp, ESP and RADIUS were not going to use any of the advanced Auth features of TMG.
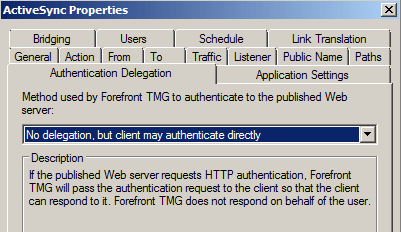
Showing no AUTH performed by TMG.
Outlook Anywhere
This Rule uses the following settings:
Authentication
Since we are leveraging Kemp, ESP and RADIUS were not going to use any of the advanced Auth features of TMG.
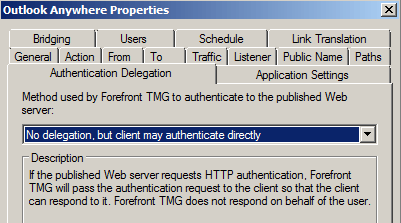
Showing no AUTH performed by TMG
OWA
This Rule uses the following settings:
Authentication
Since we are leveraging Kemp, ESP and RADIUS were not going to use any of the advanced Auth features of TMG.
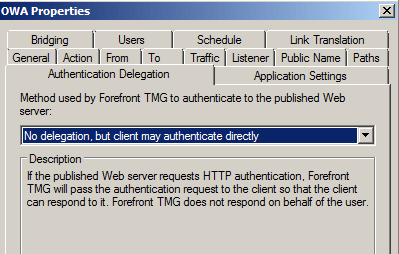
Showing no AUTH performed by TMG
Shared Listener
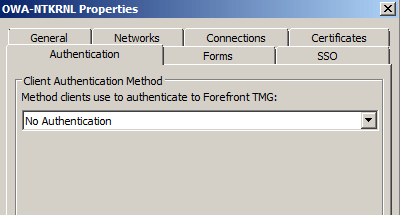
The listener here is normally used to present the TMG form. However in this case were not using any TMG specific features and are instead just using the Kemp solution.
DNS from TMG to network for autodiscover.ntkrnl.com
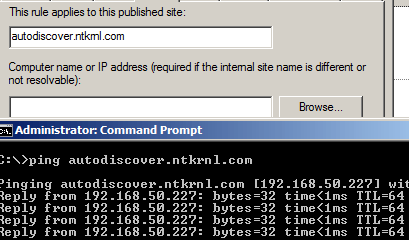

This is how TMG sends the “External Traffic” to the External VIP.
RADIUS Server Setup
The first step because we know this works and because we’re assuming that you have not done any work on this yet is to setup the 2 Windows RADIUS server.
I used 2 separate Windows 2008 Domain Controllers, https://technet.microsoft.com/en-us/library/cc771746(v=ws.10).aspx this worked well for me when tested in a lab environment.
This document will quickly cover just the steps necessary to configure the RADIUS server, policies and add the necessary clients.
- Using server Manager >> Add Roles >> Select the “Network Policy and Access Services”, select it and then Click next, allow the process to complete and then you are done. Here is some documentation on how to install a RADIUS Server for Windows 2008 https://technet.microsoft.com/en-us/library/cc725658(v=ws.10).aspx
- It is important to complete this process on 2 Separate Servers due to the way traffic is NAT’d or “reversed” through the Kemp and based on Packet captures, and other evidence, it is not possible to enable ESP SSL Bridging Re-Encrypt and expose the source IP of the client connecting.
Remember that in my scenario traffic routes like so:
Internet (First FW) >> DMZ (TMG) >> Kemp (ESP) >> Exchange Servers
By the time traffic hits the Domain Controllers (RADIUS servers) the source IP is always the Kemp and not the original client, the TMG server or any other firewall. For the Kemp to work correctly you have to enable ESP Re-Encrypt (in this scenario).
- Once completed then we can move forward with the actual configuration portion of this process.
RADIUS Client Creation (Kemp)
This part is simple; we simply add the >load balancers Source IP to the Allowed list of clients on both RADIUS servers. (Repeat on each Server until you have the same client added to both servers)
- Start
- Administrative Tools
Network Policy Server

Right Click
and Choose
New
Adding RADIUS Client to RADIUS server
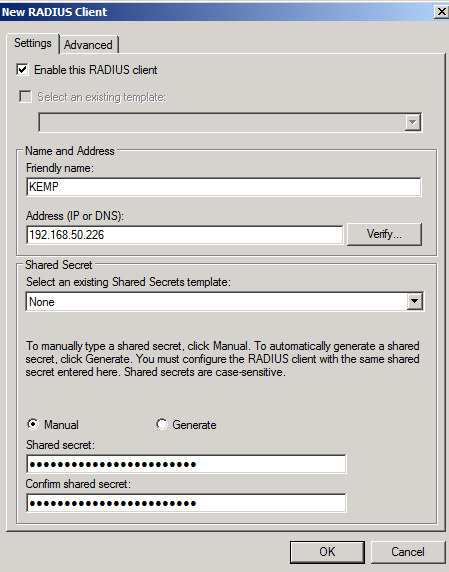
I recommend using a 22 Character or better password for your RADIUS Shared Secret; this is per Microsoft’s documentation and is done in an effort to reduce Hash Cracking viability against the RADIUS Messages. https://technet.microsoft.com/en-us/library/cc740124(v=ws.10).aspx
Note: Try to use longer passwords that avoid
punctuation characters
- I found in some cases using passwords that are either too long or use punctuation characters would create failed logons.
Showing Client Added in RADIUS Server
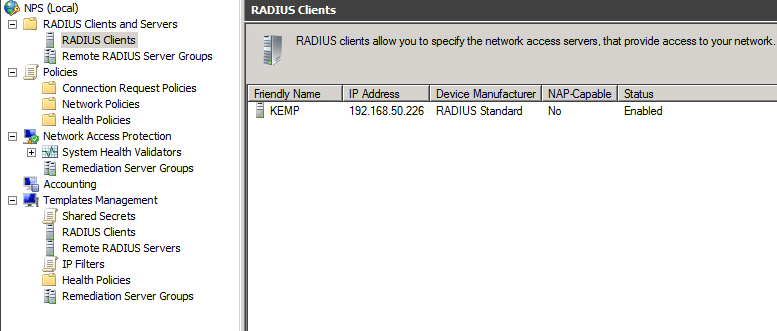
I’ve found that using PC Tools for Windows
Password Generator
is the best at creating passwords that are sufficiently complex.
https://secure.pctools.com/guides/password
Create RADIUS Policies
This is the internal Policy
Start
Administrative Tools >> Network Policy Server >> Expand Policies >> Network Policies
Right Click >> New
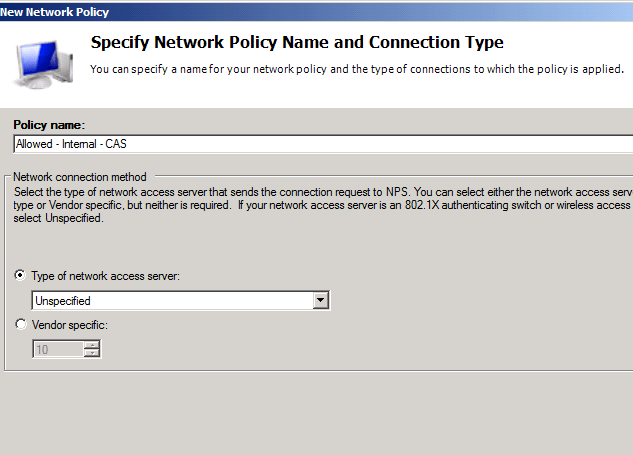
Type the
Name
and Click Next
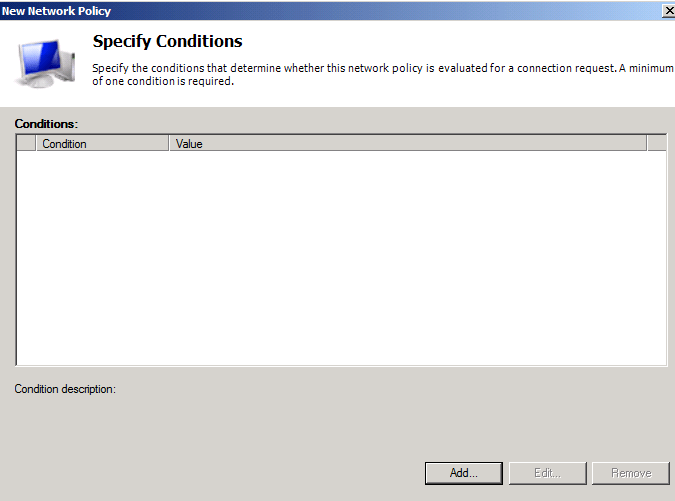
Click Add
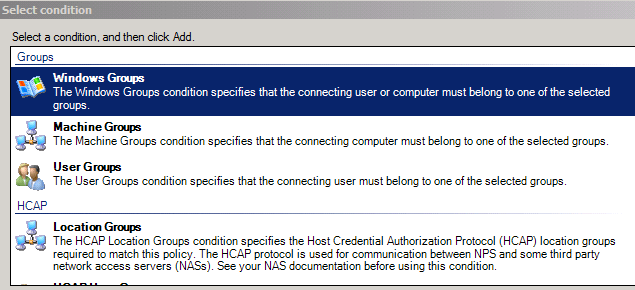
Click >> Add Groups
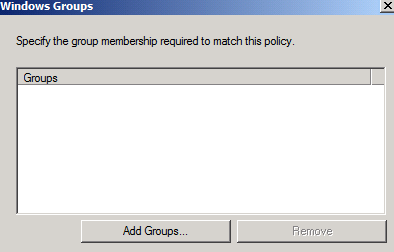
Select the group you previously created (not covered in this document) and add that group to this policy, the group should be a (domain local group), this is where the actual work is done; any group added here will allow member’s access to OWA and ECP internally.
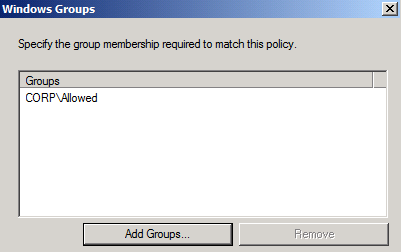
Click >> Ok
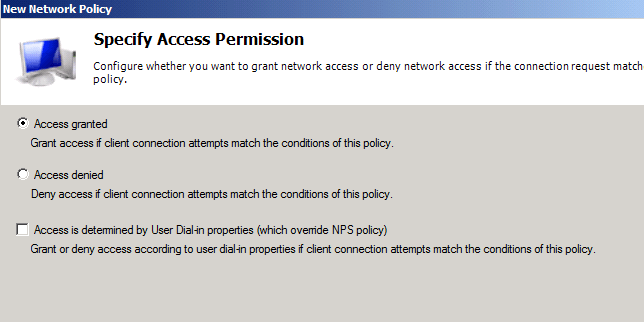
Select >> Access Granted >> Click >> Next
Then select the authentication type
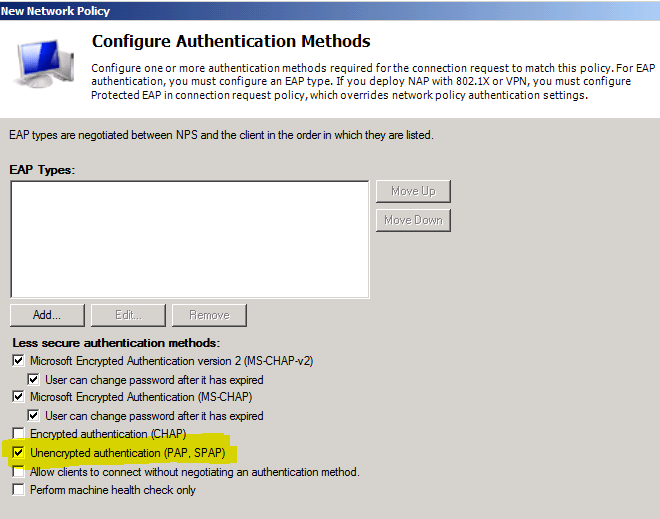
Shown below:
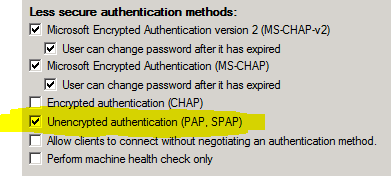
You want to select “Unencrypted Authentication” (PAP/SPAP) – The password is hashed in part with the
Shared Secret
you created when you setup the
RADIUS Client
, this is
128 Bit MD5 Hash
and is not by itself the most secure thing that ever was, however auth traffic only passes from the Kemp (Client) to the Domain Controller that data contains the username in
clear text
– but as mentioned the password is encrypted.
Additionally since the data is only passing from the Kemp (RADIUS Client) to the Domain Controller and since that is all on the internal LAN side,
you should be fine in terms of security, but validate for yourself don’t take my word for it.
Click Next
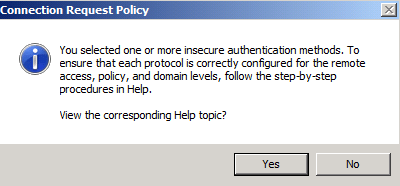
You will see the following Dialog Box pop up
Click >> No
Then you will see this
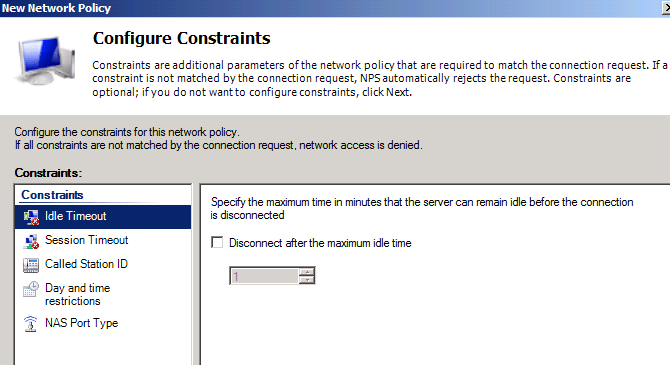
Click >> Next
Then you will see this
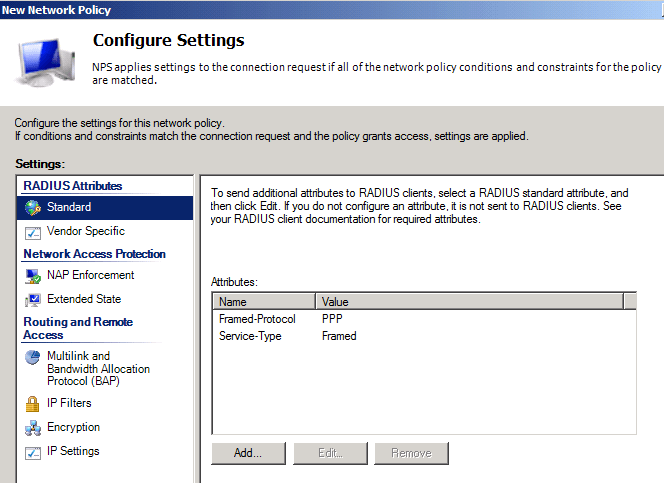
Click >> Next
Then you will see this
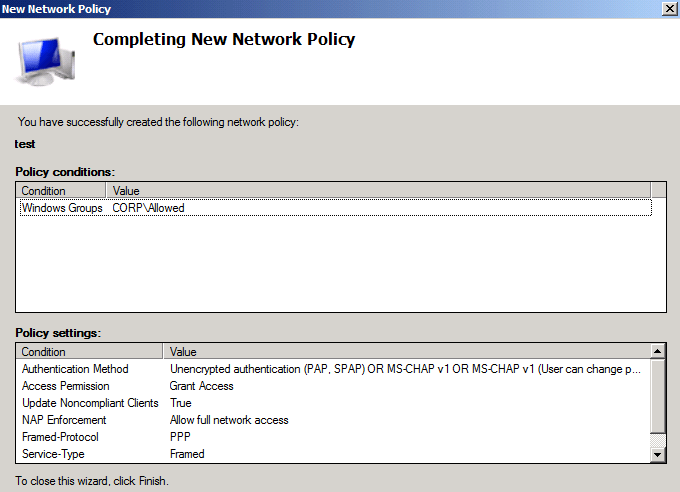
Click >>Finish
We’re now done with the First Policy, Create the same policy on the other RADIUS Server.
Kemp LoadMaster
Create 2 separate SSO domains on the LoadMAster for users to gain network access via OWA/ECP. This step is crucial but not difficult.
Browse to the Kemp WUI and then go to the following:
Home
Manage SSO
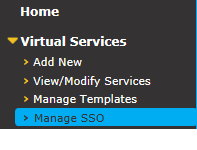
We’re looking at the following “Client Single Sign-On Configurations”
 Type in the name (either) ext.domain or int.domain

Click
Add

Select
RADIUS
Authentication Protocol
Type in the IP address which will be used for the “Internal VIP” or in this case the “External VIP” – for me the Domain Controller that will be providing Auth for the
External VIP Connections
will be 192.168.125.2

Adding the shared secret and the RADIUS servers IP is all that’s needed here, adding the domain/realm is unnecessary.
(Same process as above, showing the Internal VIP)
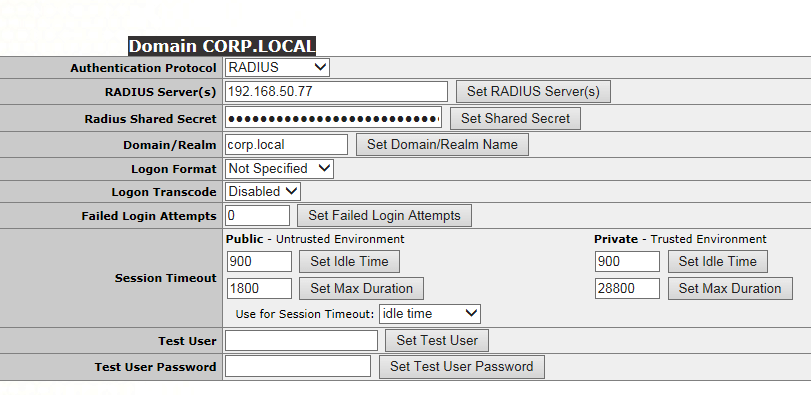
Showing separate RADIUS Server which will be used by the internal VIP.
Kemp Configuration (VIPs)
Now were going to look at which policies apply where. This will be the final step in attaching the right Auth methods. First we need to discuss the firewall and DNS policies.
Let’s take a look at how the Kemp is routing traffic internally and externally
Home
View/Modify Services
 Click on the NTKRNL-OWA2-Internal VIP
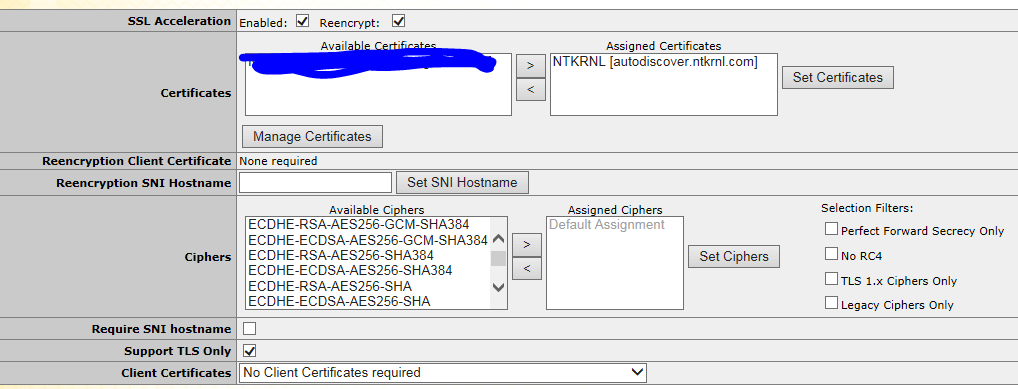
For
ESP
to work correctly you need to
select
“SSL Acceleration” Enabled and “Re-encrypt”. ESP is the whole reason why we are setting this up the way we are. For ESP to work correctly the Kemp has to be able to decrypt and then re-encrypt the traffic.
ESP Options (Not Selected)

Notice that ESP Is not enabled here, that is because it will be enabled on the SubVs.
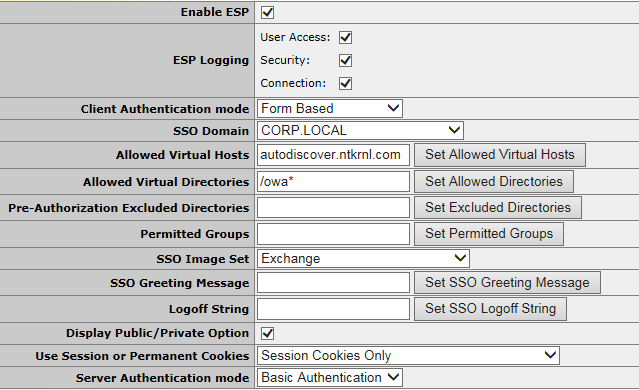
ESP Is enabled
Client Auth Mode is
Form Based
Server Auth Mode is
Basic.
Showing SubVs

Setting up the Kemp itself is outside of the scope of this document. But we do need to touch on a few items here in order to make sure this project works correctly.
Select
OWA and ESP

Click
Modify
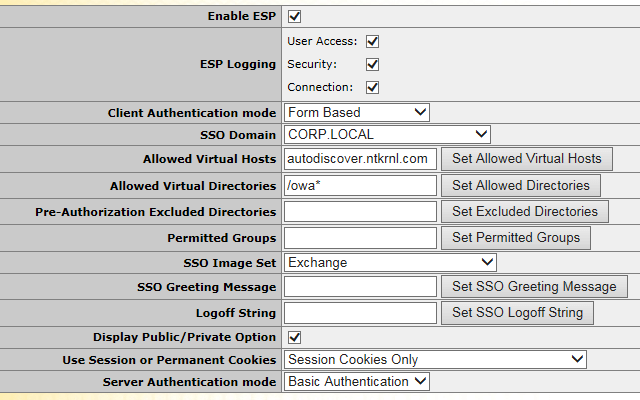
Make sure to set the Correct SSO Domain and the Correct URLs, Correct Allowed vDirs, and Auth mode.
Now we add the “Real Servers”
Click >> Add New

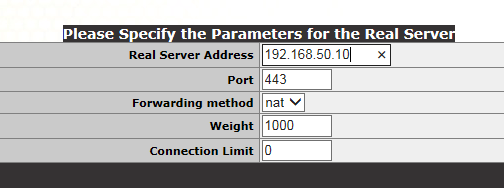
Click Ok

The real server has now been added, we’ve added the Exchange Server here and not a domain controller.
Showing Login Process
Showing Internal Traffic Routing
{Internal LAN} >> DNS 192.168.50.229 >> NTKRNL-OWA-Internal (VIP) >> Exchange CAS servers

Internally all Exchange Services route to the correct VIP using DNS
. This solves the “how do I” allow all users internal access to OWA while blocking them from accessing OWA externally this is done via allowing
“Domain\Users” access in the Allowed Group.
Showing External Traffic Routing
This is different than the above because traffic actually goes like this:
{Internet (WAN)} >> DMZ (TMG) >> (TMG >> Kemp VIP) >> Kemp (CAS) >> Exchange 2010 CAS Servers
- (Internet) >> Netgear Firewall

- (Internet) >> Netgear Firewall >> TMG

- (Internet) >> Netgear Firewall >> TMG >> Kemp (Ext VIP)

- (Internet) >> Netgear Firewall >> TMG >> Kemp (Ext VIP) >> Exchange CAS Servers (Real Servers)

That’s it!!
The traffic from the internet is routed through the DMZ to the TMG server and then to the Kemp (VIP) that authenticates correctly the externally configured “Allowed” group in the 2nd RADIUS server.
Each Step is shown above to make it easier to follow.
Testing:
This will show how it works when a domain user is allowed via the internal policy. All users should be added here to ensure that your users won’t experience connectivity issues.
Internal:
Hostname: Server1 (DC)
IP: 192.168.50.77
Zone: (LAN) Internal, VIP Internal
Network Policy:

Groups:

If a person is not part of this policy they are not allowed to connect.
Allowed Groups in the “Corp\Allowed”
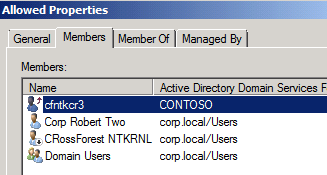
I have several Groups, but Domain Users worked fine as well. Notice the CRossForest user; this is where linked mailboxes users are allowed to connect,
without that one last step the whole project fails.
Testing:
This will show how it works when a domain user is allowed via the External Policy. The key point here is the RADIUS server controls user access based on group regardless of the other RADIUS servers Groups / Settings.
External:
Hostname: Server2 (DC)
IP: 192.168.125.2
Zone: (LAN) Internal, VIP External
Network Policy:

Groups:

If a user’s account is not part of this policy then they are not allowed to connect
Allowed Groups in the “Corp\Allowed-External”
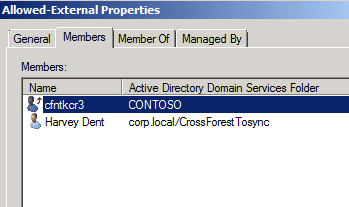
I only have a few users listed here and those users are the only ones allowed to connect externally. All other users are denied because they do not match. Notice the cross forest user; this is where linked mailboxes users are allowed to connect,
without that one last step the whole project fails.
Client Side Testing:
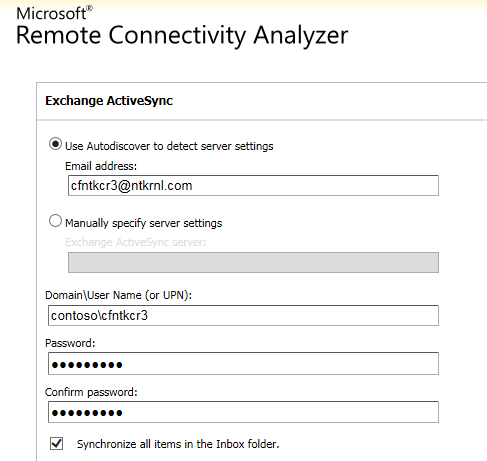
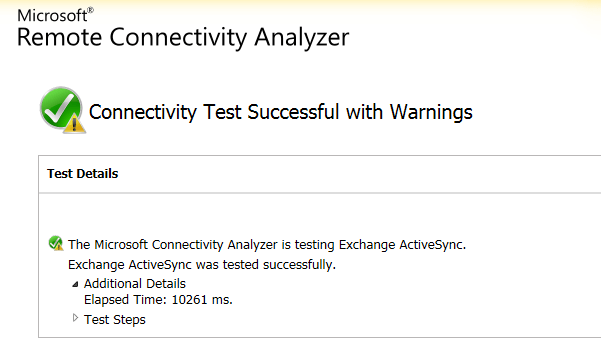
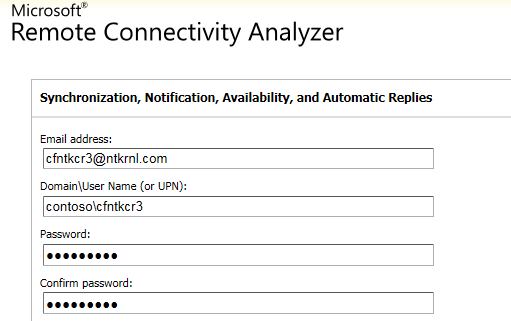
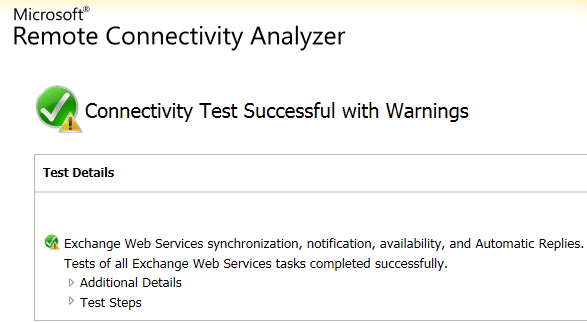
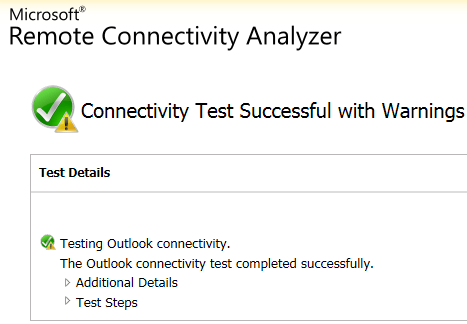
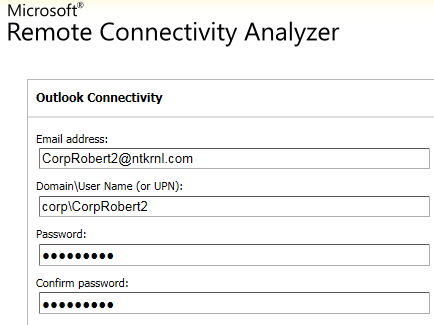
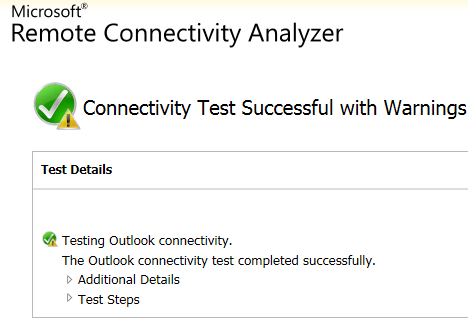
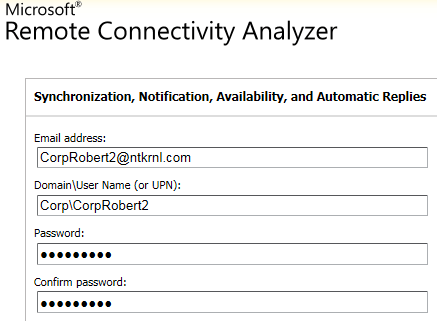
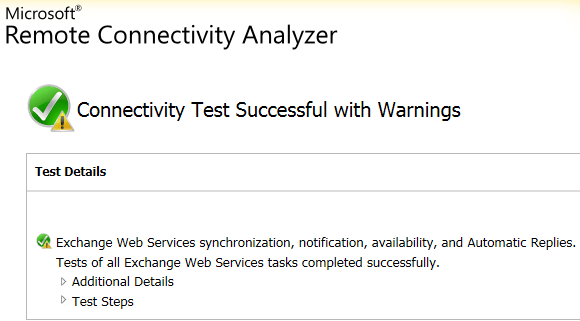
Exchange Remote Connectivity Analyzer showing that all client connectivity is successful for both (Corp.local) accounts and (contoso. Local) accounts.
Account:
contoso\cfntkcr3
Password:
user password
Mailbox Type:
Linked (Account forest: Contoso.local) – Mailbox Forest (Corp.local)
ExCRA for AS:
ExCRA for EWS:
ExCRA for OA:
Using an linked mailbox account
Account:
Corp\CorpRobert2
Password:
user password
Mailbox Type:
Local (Account Forest, User Forest = Same Forest)
ExCRA for OA:
ExCRA for EWS:
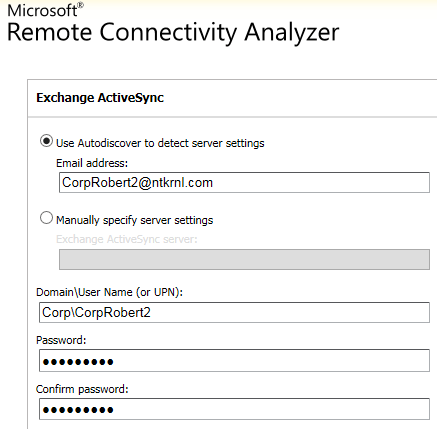
ExCRA for AS:
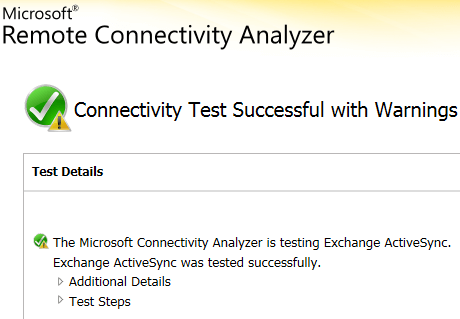
Using a local mailbox account
Notes:
- Kemp support helped out with the setup of the load balancer and VIPs including the VIP (SubVs) configuration.
- Make sure to enable the “Connection Request Policy” – Use windows Authentication for all users. This is a necessary step to allow the users to authenticate.
- Make sure to enable PAP in the policies you created or you will get Auth failed issues all and no accounts will authenticate
- Address Book lookup had issues when using MAPI and HTTPS however that is most likely due to an issue with one of the servers in the test lab
- All testing was done using fully routable IPs and valid trusted certificates for both internal and external access this was done to ensure that this process actually worked
- If not for the issue with linked mailboxes LDAP auth would be the solution to use and would be significantly better and more secure however that feature is going to be added in a future version of ESP.
- Ensure that Kemp Firmware Ver.7.1-24b or later is installed.
- Although permitted groups were not used in this document its best to make sure you are up to date
- Permitted groups do not work when using RADIUS based Auth, only when using LDAP based Auth
- TMG is considered out of scope for this document but I have added some basic screenshots to make things a little easier
- From a security perspective, you probably could use a Direct LDAP connection from the TMG box to the DC’s; I felt that it was less secure to establish a connection from the DMZ to the LAN. There are numerous ways of achieving this goal.
- Make sure you do not enable the “Message Authenticator” Attribute. That is not a supported method for this process.
- The least amount of changes made to the Exchange server is part of the reason why I did it this way, you could have created a second OWA and ECP vDir on all the Exchange servers and bypassed any type of Auth on the internal VIP (By routing that traffic to the internal VIP from the Kemp to the new vDirs, not using ESP and using the Exchange Form)
