
Global Traffic Management with NS1 and Kemp
Start Free TrialIntroduction
Many enterprises use Kemp load balancers to distribute load within their data centers. These enterprises can now extend the value of their deployments with cloud-based DNS traffic management from NS1. A joint solution from Kemp and NS1 ensures optimal load distribution between data centers, preventing overloads at one location while another may have plenty of capacity. This solution guide provides step by step instructions on how to use the key capabilities from NS1 and Kemp to build an optimized Global Traffic Management solution.
Solution Example
Let’s take an example of an enterprise infrastructure comprising 2 data centers, one in LA and one in Atlanta. These data centers support a public facing web service "Kempexample.com", each front ended by a Kemp load balancer.
The public IP address of each load balancer is as follows:
LA data center: 1.1.1.1
Atlanta data center 2.2.2.2
The objective of the Global Traffic Management solution is as follows:
- Do not connect any user to an unavailable data center.
- Connect users to the geographically closest data center unless the number of active connections at that data center approach or exceed a threshold. As the load approaches the threshold:
- Send a progressively higher proportion of incoming requests to the other data center.
- Send no more requests to a data center where the load exceeds the threshold.
Step by step instructions for setting this up on the NS1 platform follow below.
Step 1: Set Up the DNS Zone and Record
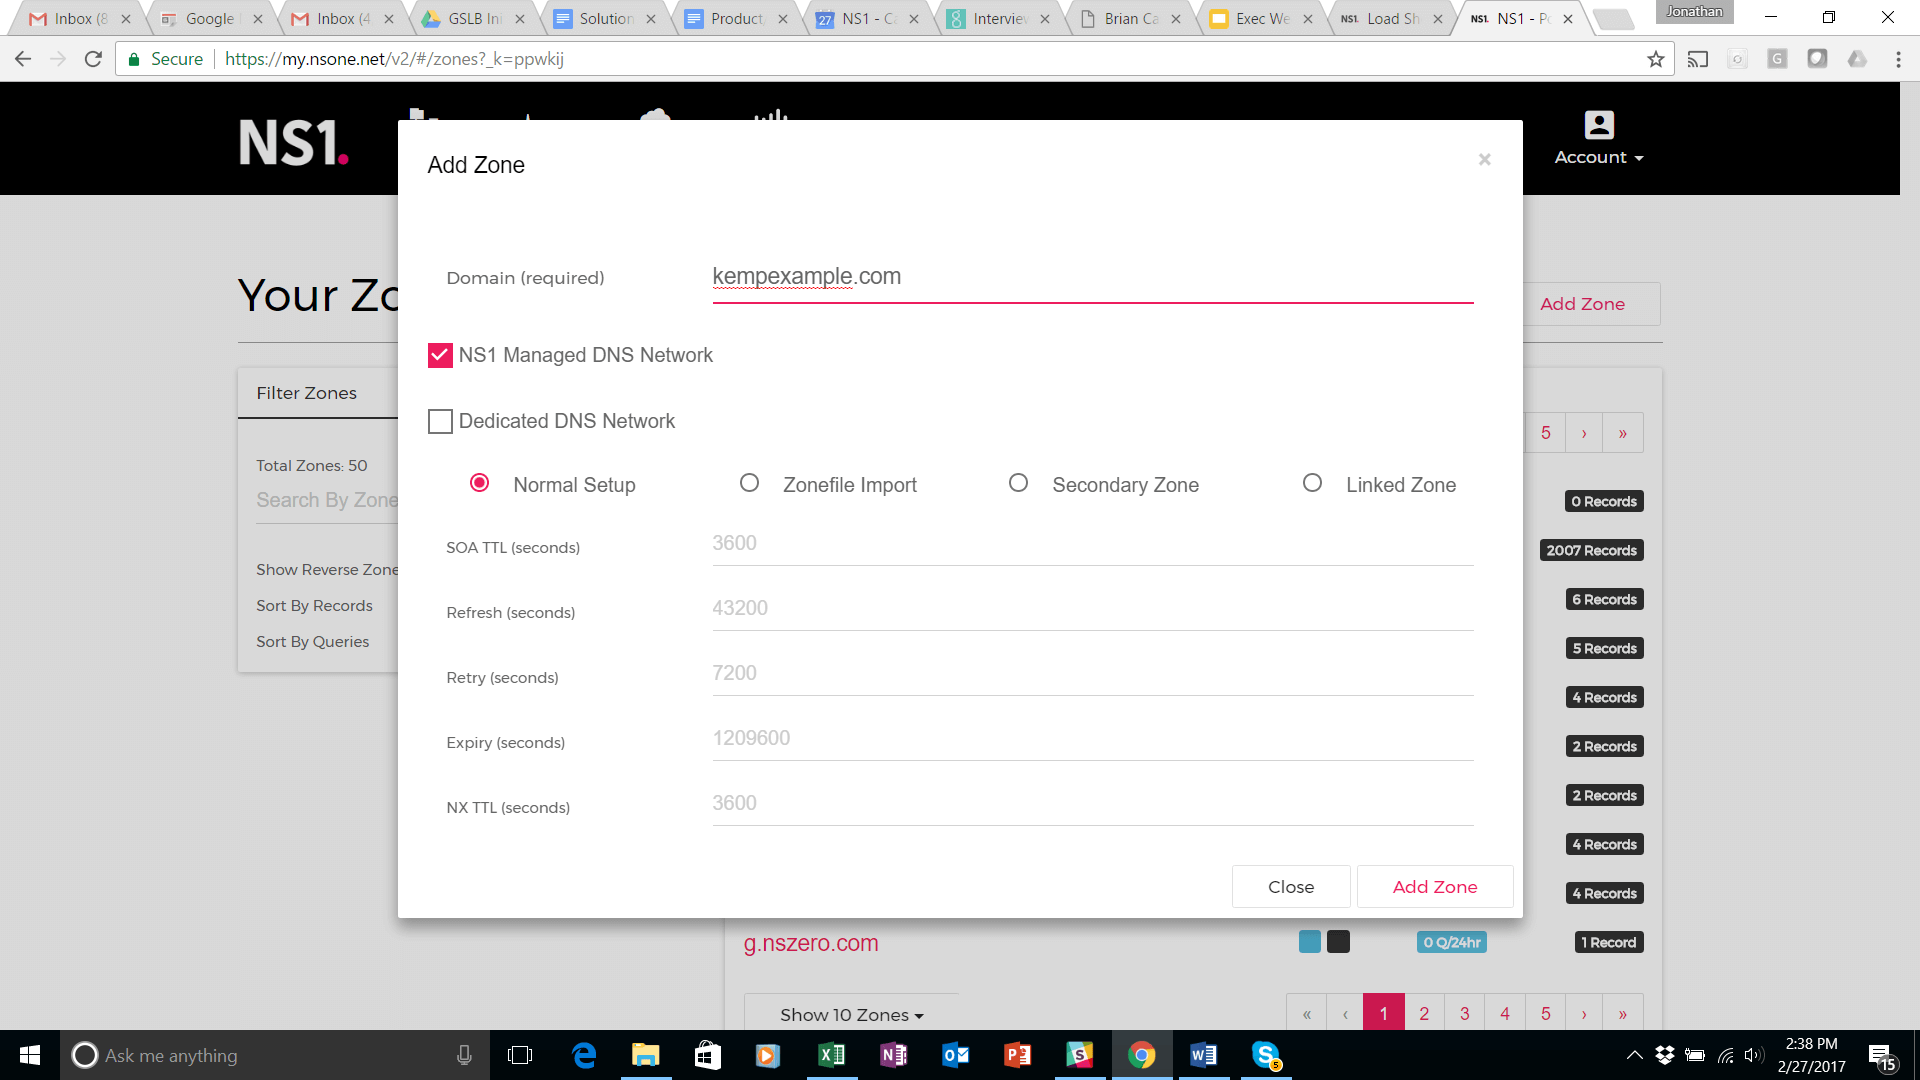
First, you will want to add a zone and records to the domain that you are looking to configure. This can be done by clicking on ‘Zones’ at the top of the screen within the portal.

Select Add Zone. (Kempexample.com in this demonstration set up).
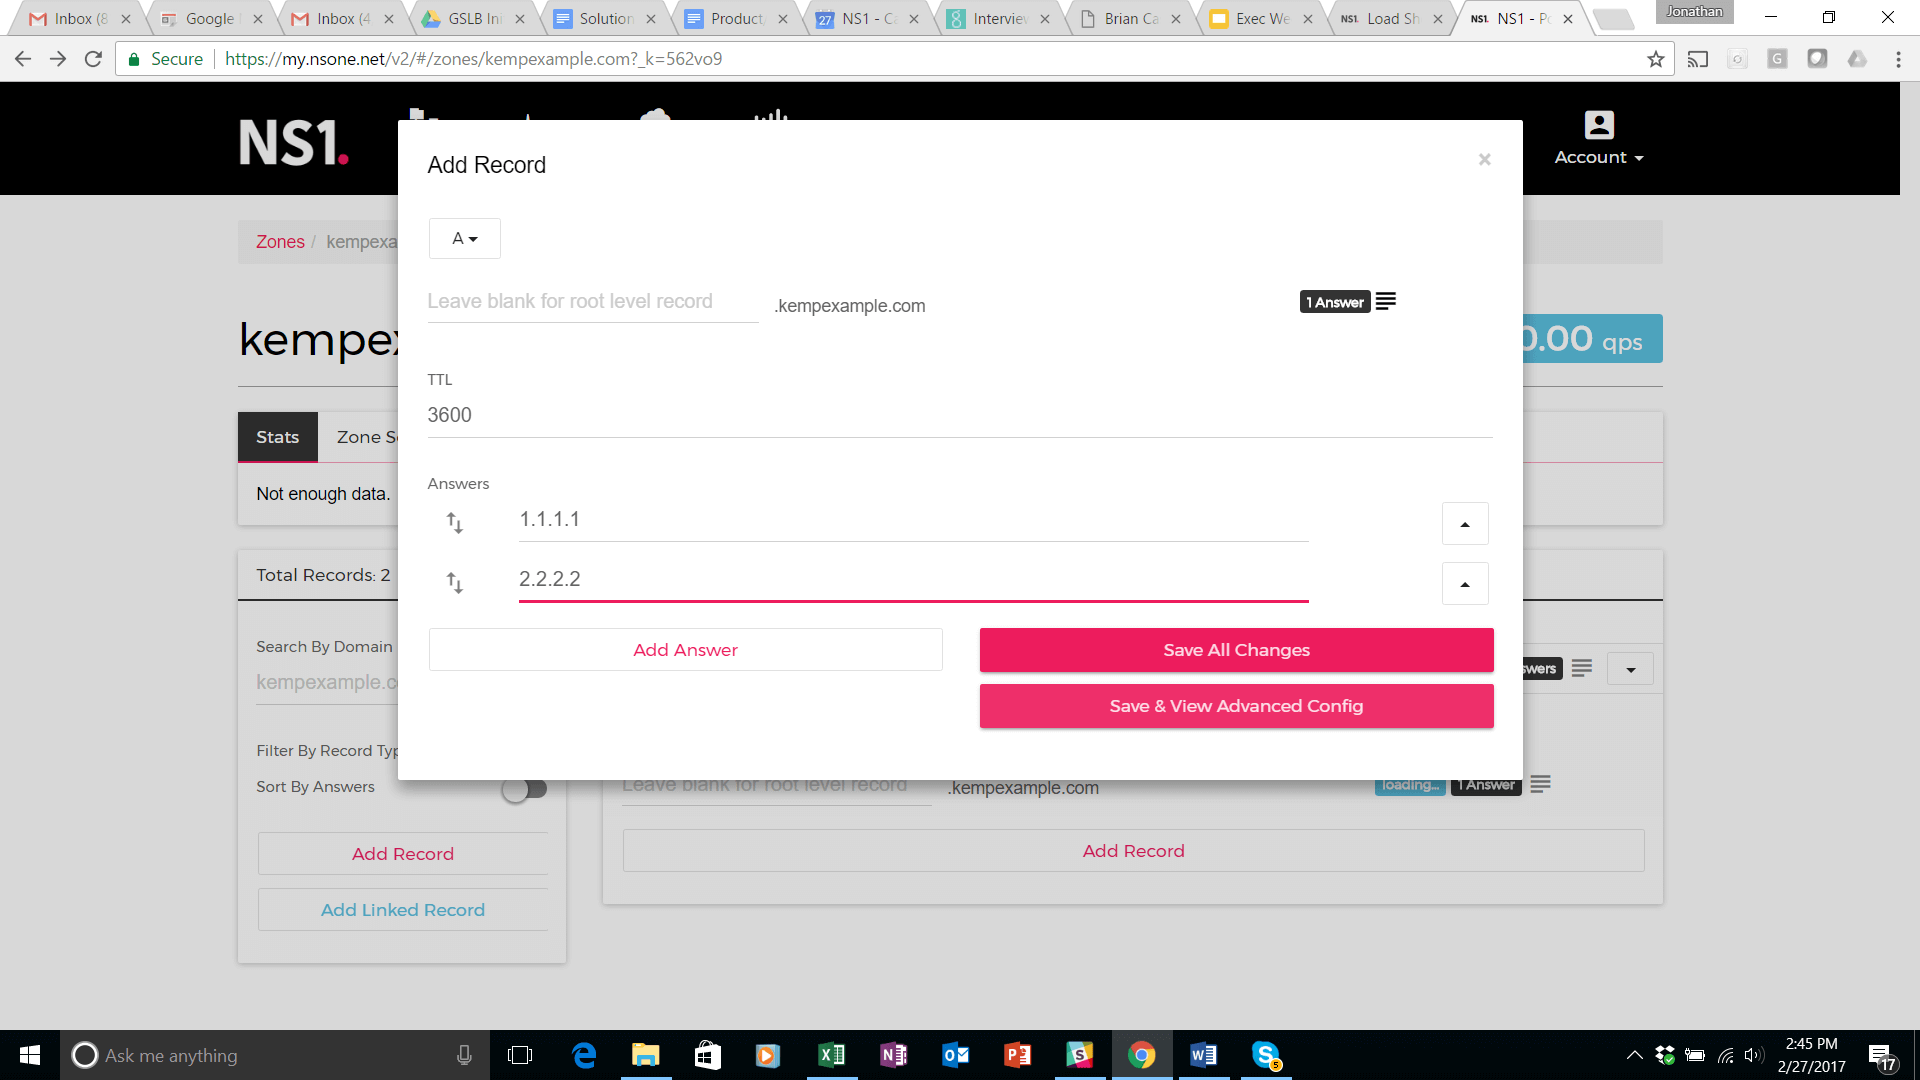
Add a record to the zone, with 2 answers corresponding to the IP addresses of the LA and Atlanta load balancers (1.1.1.1 and 2.2.2.2 respectively).
Your A record with 2 answers appears as shown below:
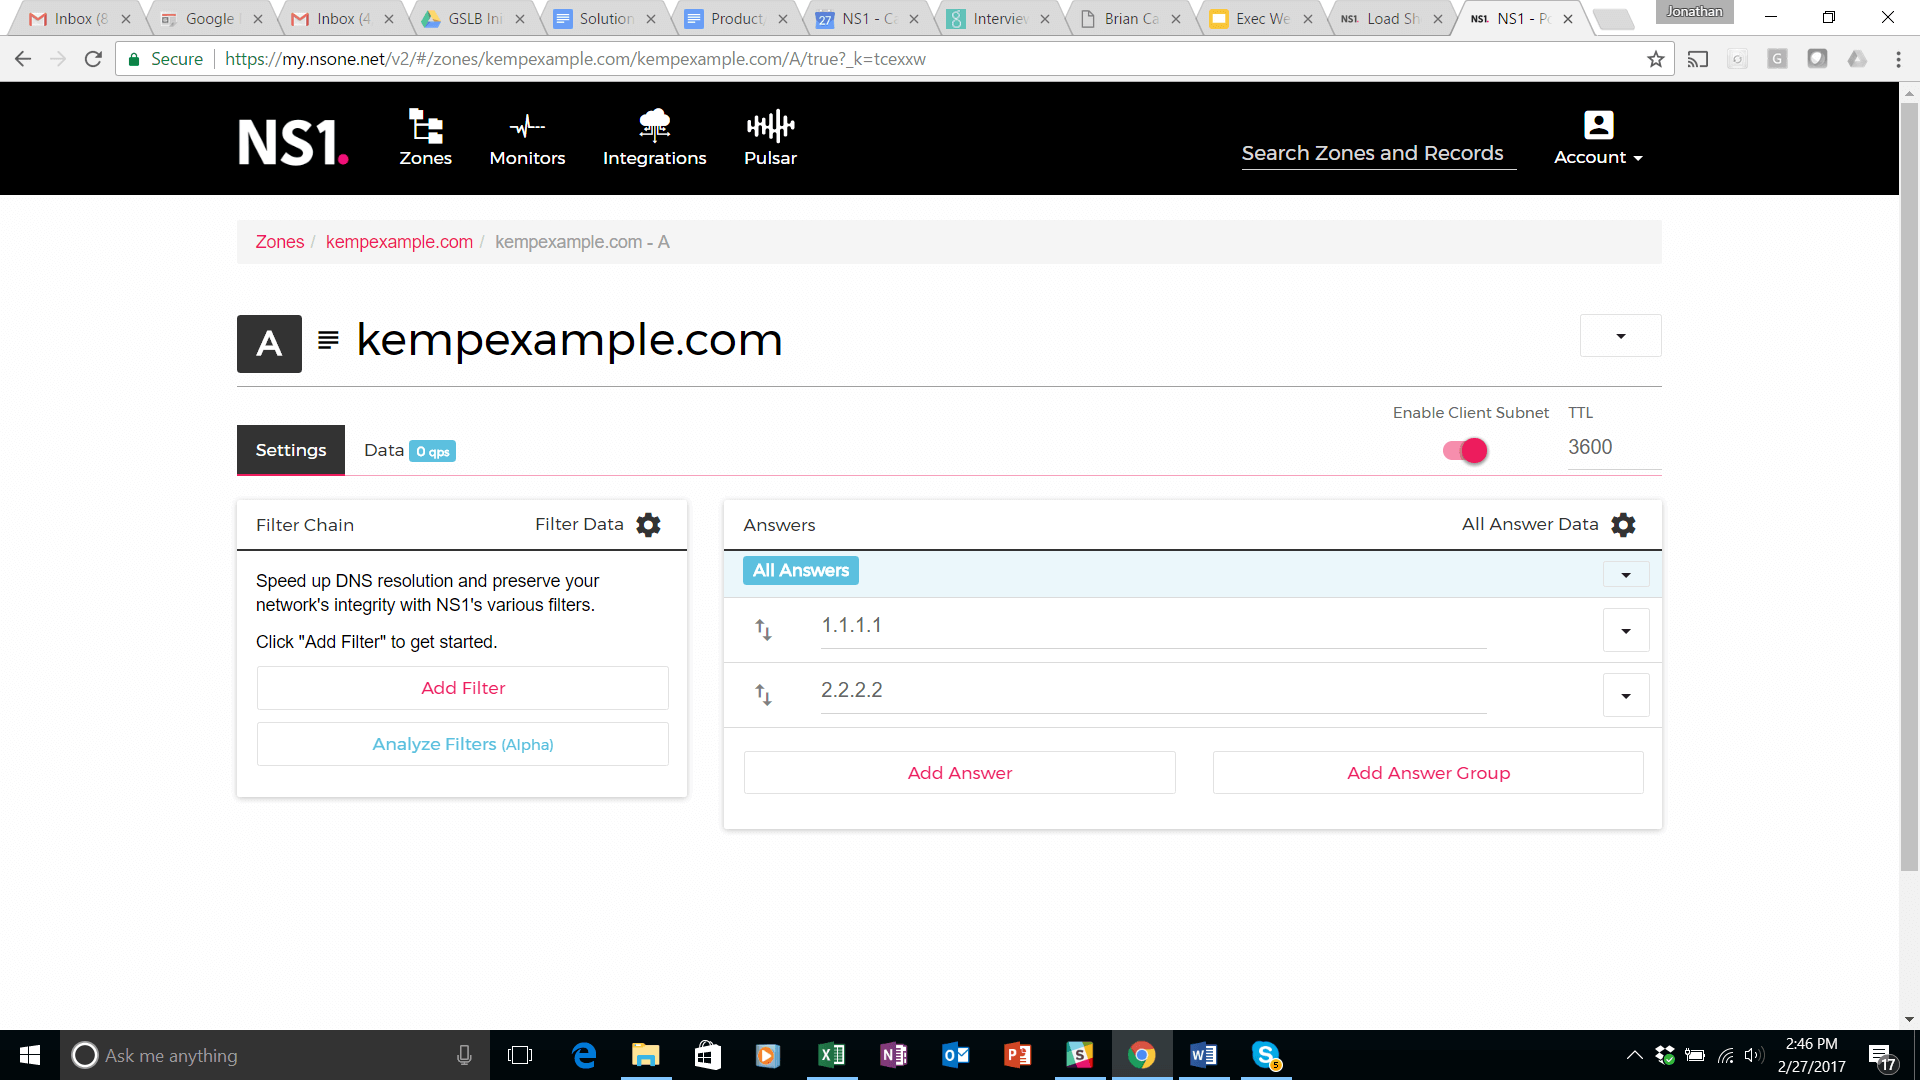
Each IP address is the external IP (or VIP) of the load balancer at each data center.
Step 2: Set up the Data Feeds to Supply the Meta Data to Each Answer
In NS1, it is straightforward to associate meta data with DNS records. Meta data can represent both static and dynamic attributes of the resources that the records point to - in this case, Kemp load balancers located in the LA and Atlanta data centers.
The first meta data attribute we will configure is geographic location. This attribute will be used to compare the location of the requesting user with the location of the data center and choose the answer that is closer to the requesting user.
Click on the drop-down icon to the right of the 1.1.1.1 answer and choose “Settings”.
A list of settings will appear. Select Georegion. Check the box for US West.
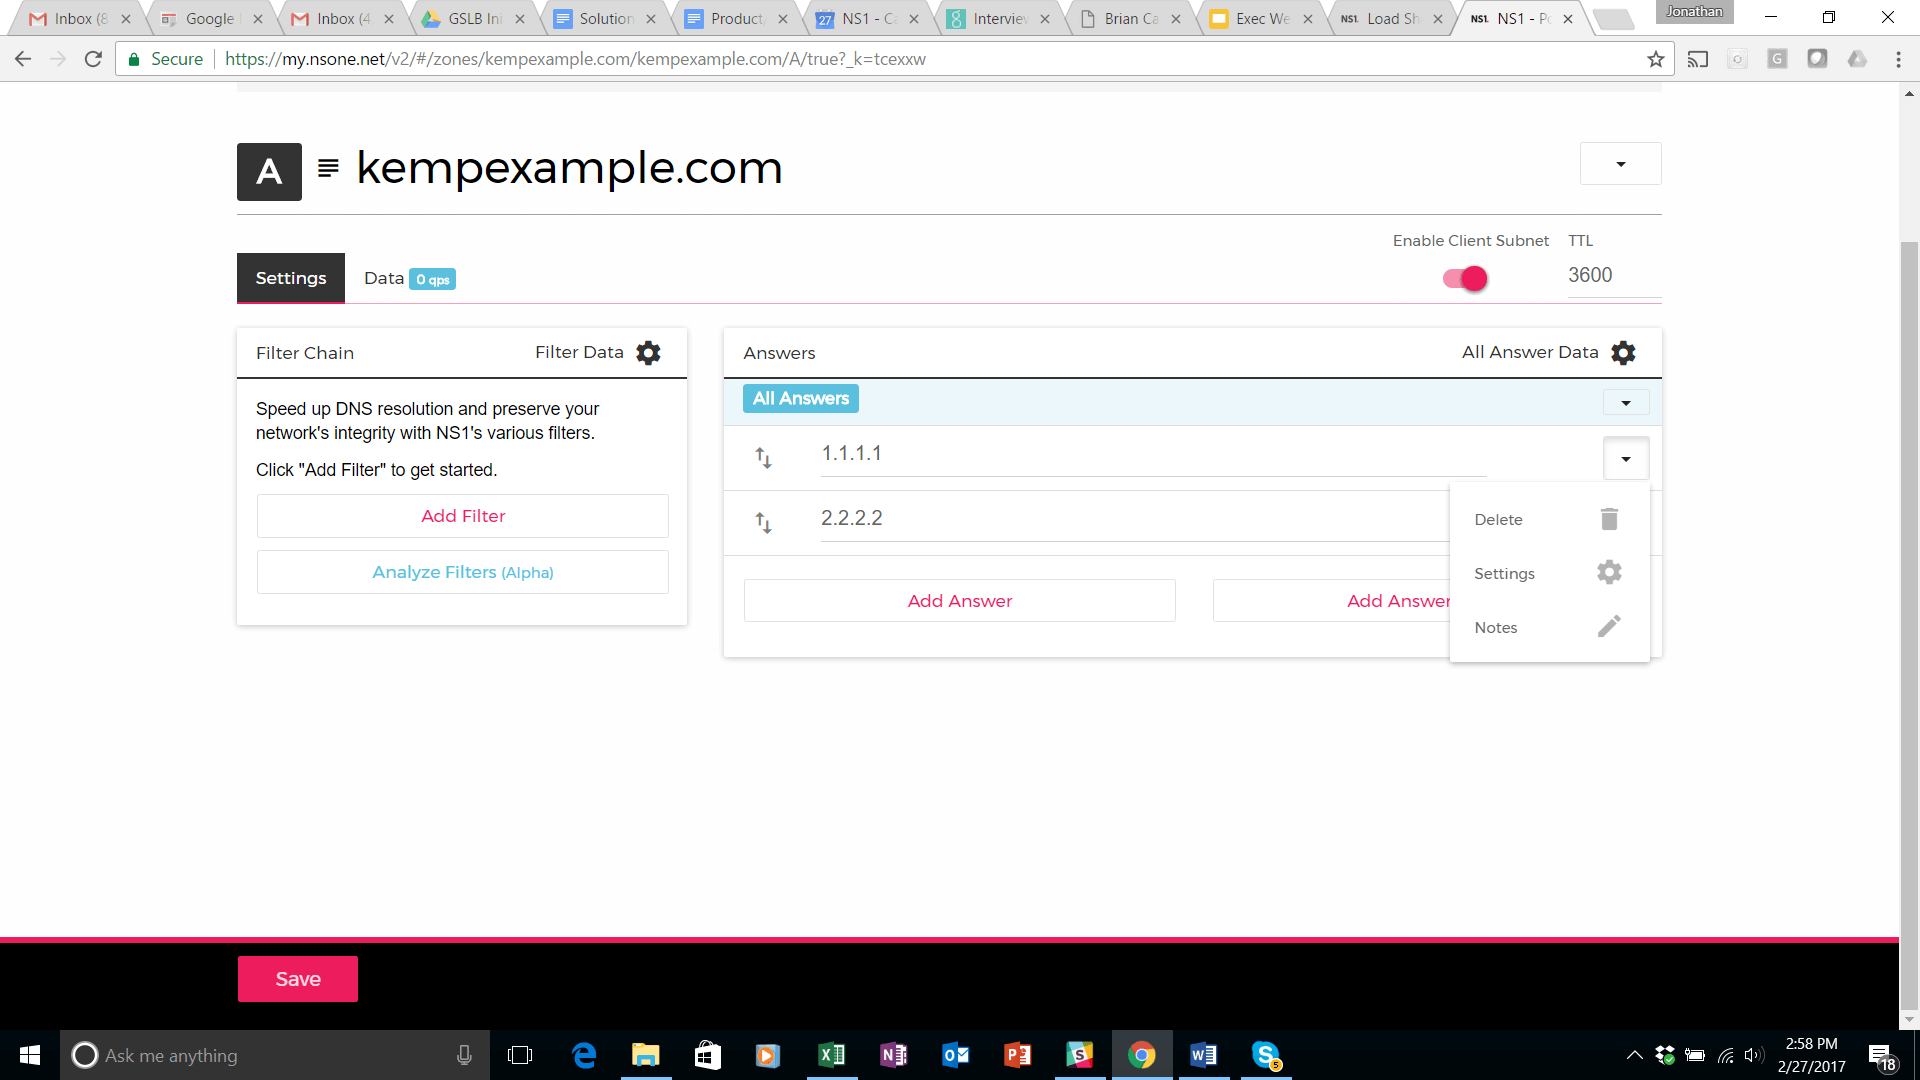
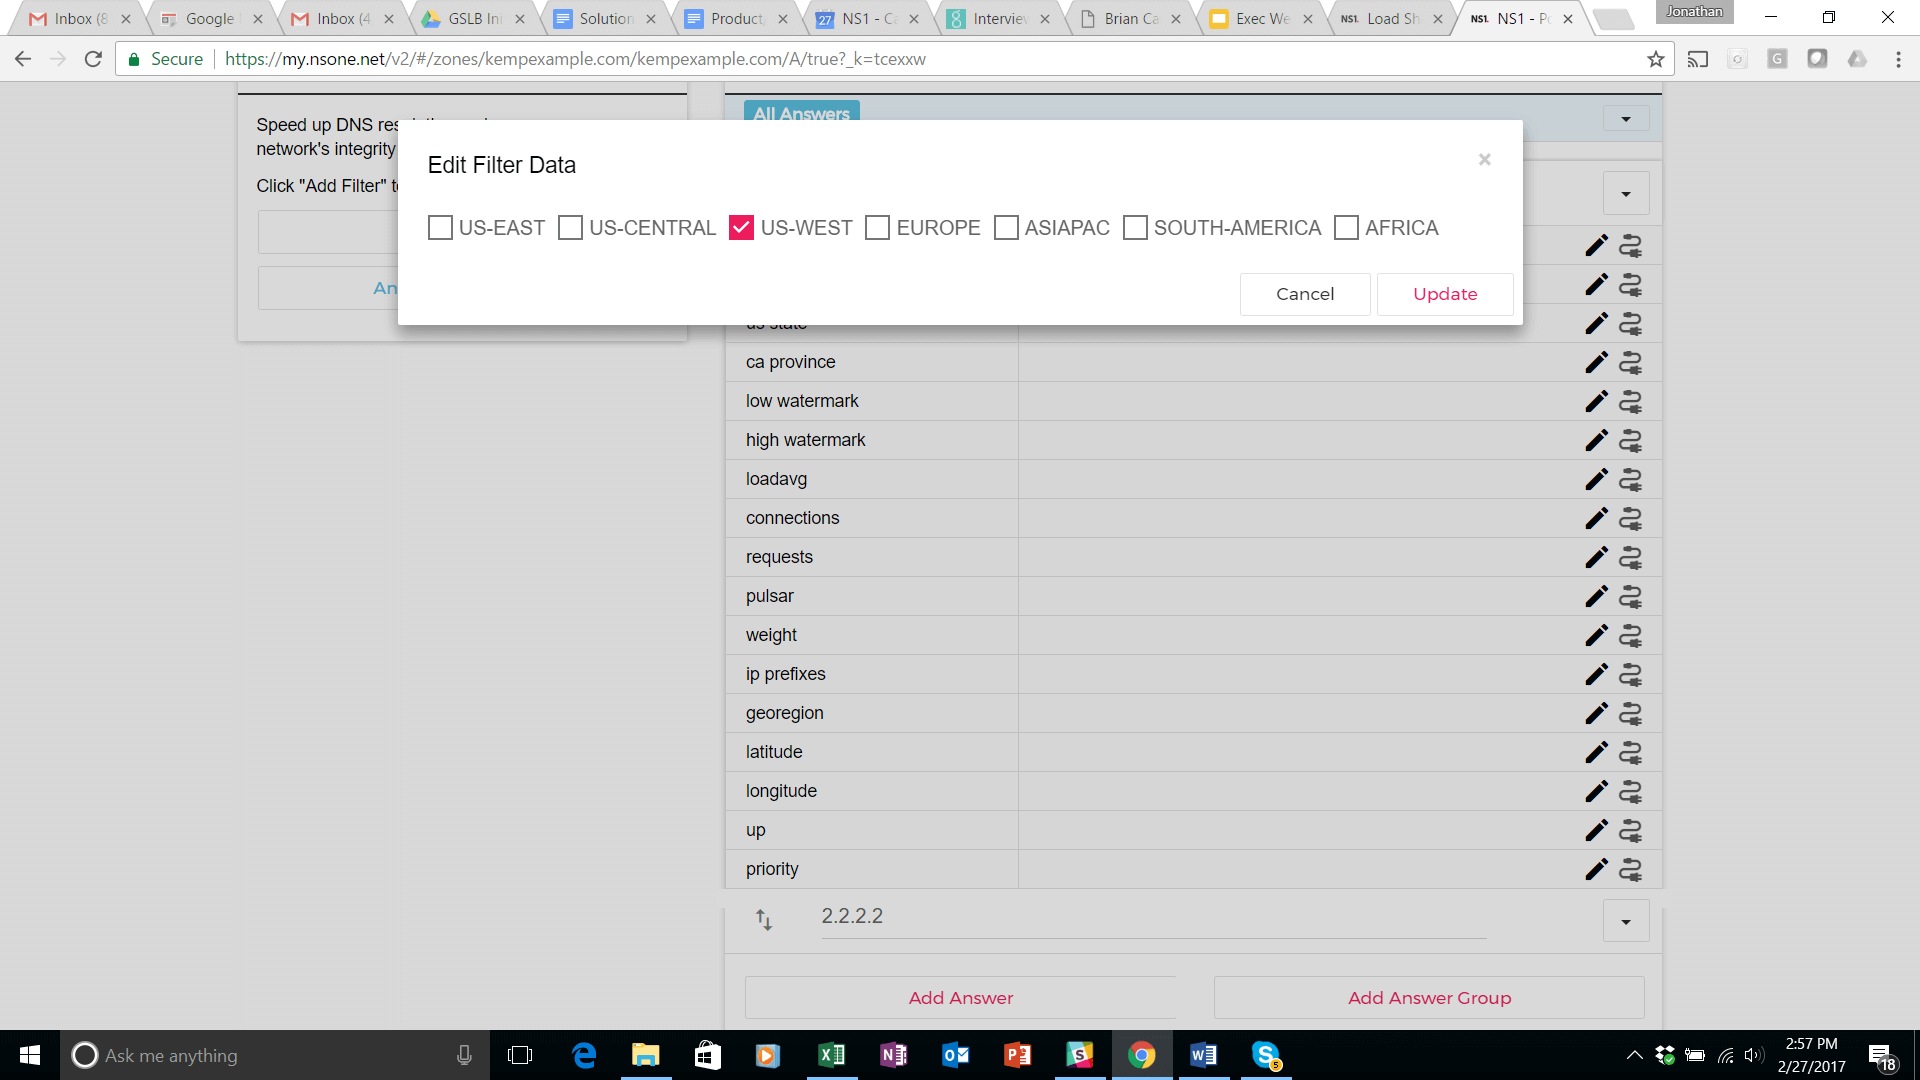
Perform the same steps for Atlanta location (2.2.2.2) and assign US East to that answer.
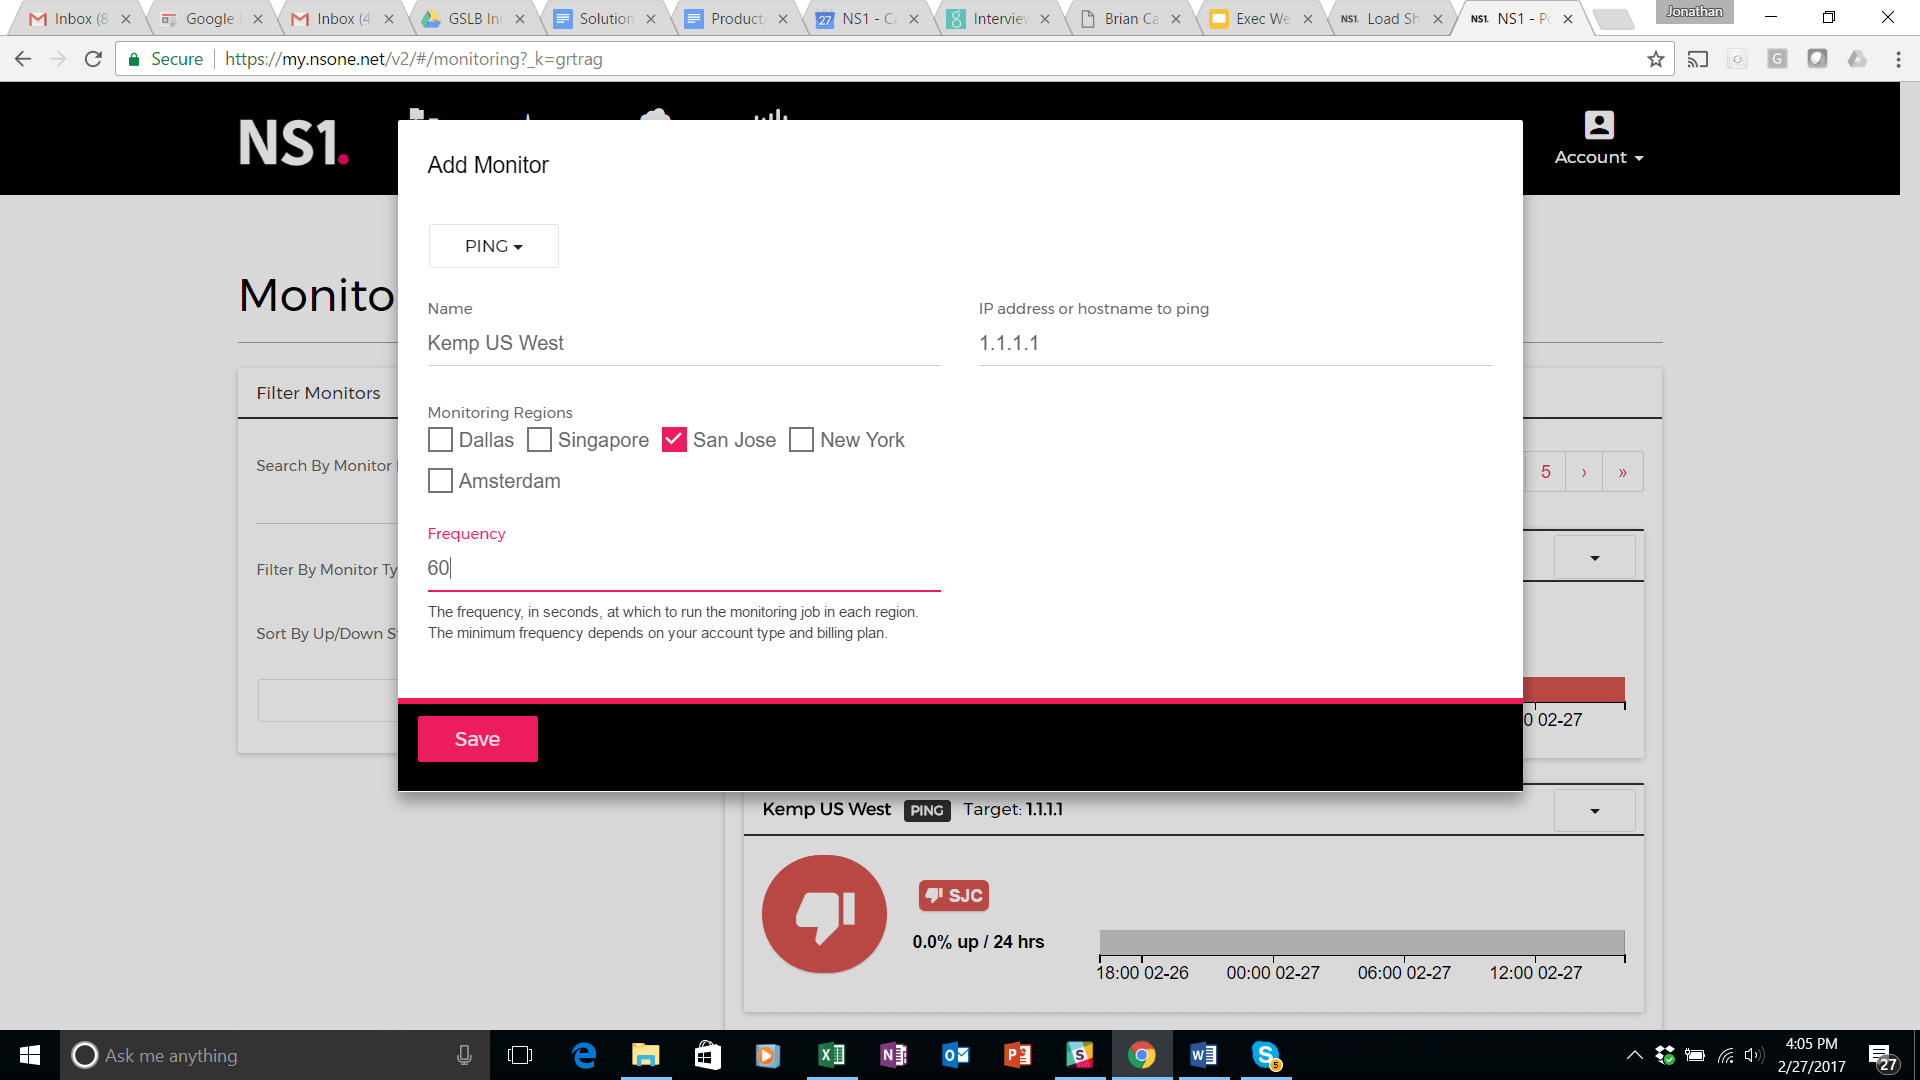
Next step is to attach dynamic (or real time) meta data to these answers. The first of these is up/down status. For that, we use the monitoring capability of the NS1 platform to PING the IP address of each Kemp load balancer and feed the result to the DNS answer. (If you use your own monitoring or a 3rd party monitoring service, consult the NS1 knowledge base to set up the configuration). First, navigate to the ‘Monitor’ tab at the top of the screen. Select Add Monitor on the next screen. Upon doing so, you can choose the monitoring protocol you would like to use. In this example, we are using PING. Configure the initial settings as shown below. We named it Kemp US West and we are monitoring with a frequency of 20 seconds in this example.
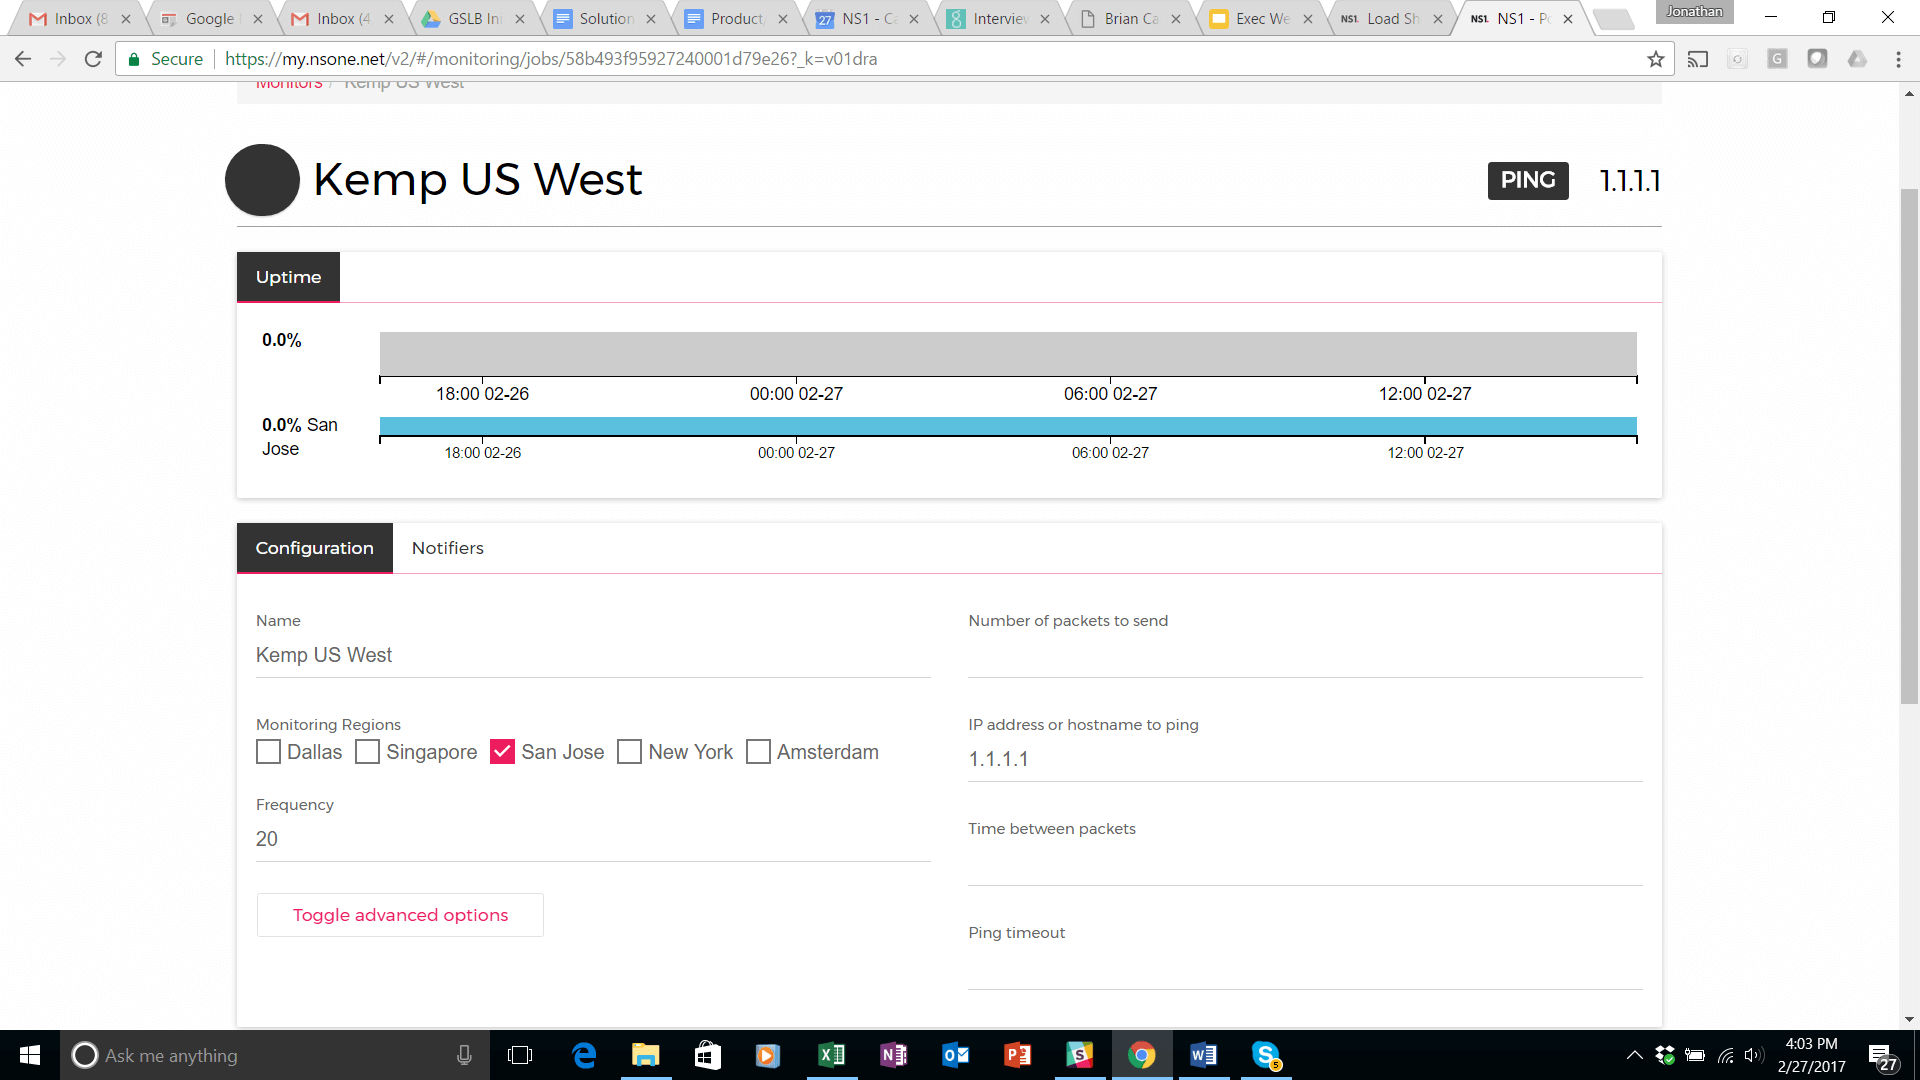
After saving this, you will be brought to a screen where you can further configure your monitor to be more granular if you see fit.
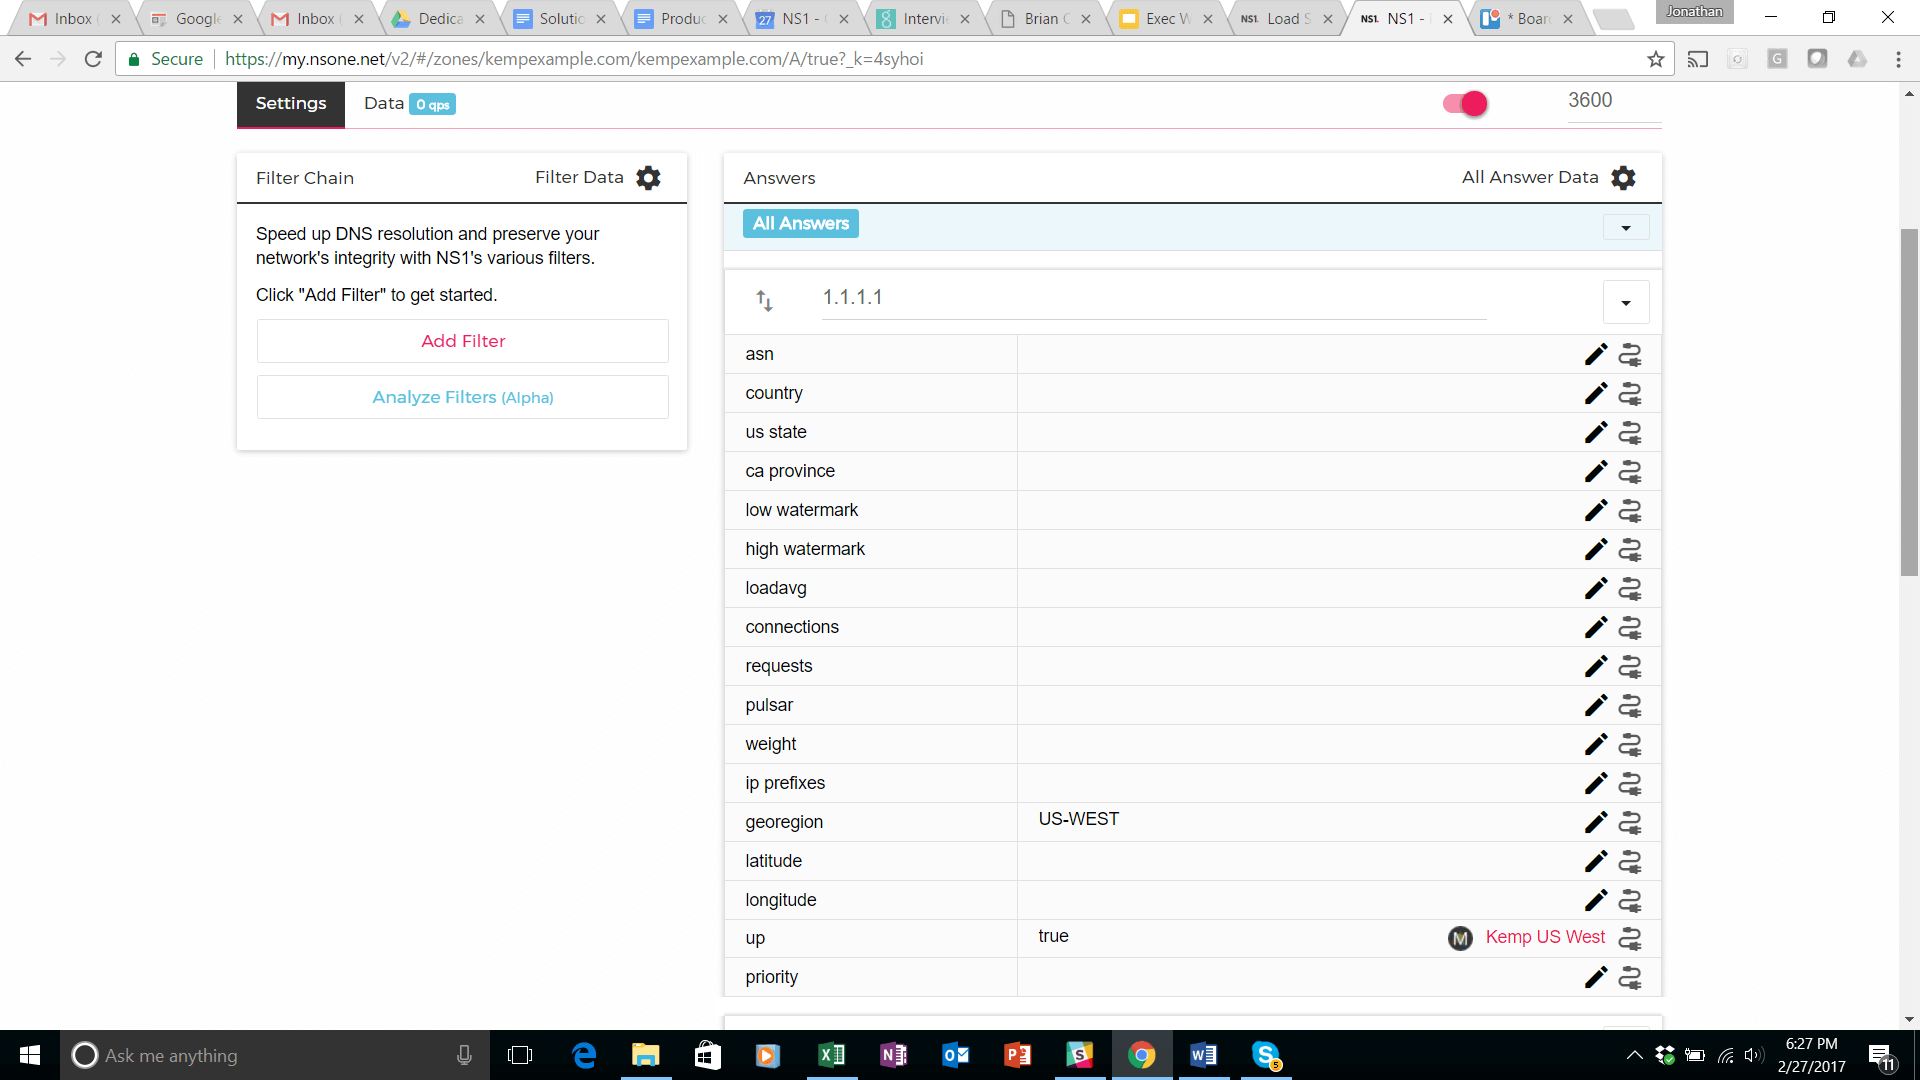
Next, connect the monitor you just set up to the 1.1.1.1 answer in the Kempexample.com record. Find the Kempexample.com in your zones, click on settings for the 1.1.1.1 answer, look for the UP setting and click on the icon on the right of that (icon looks like an electric cord. See below:
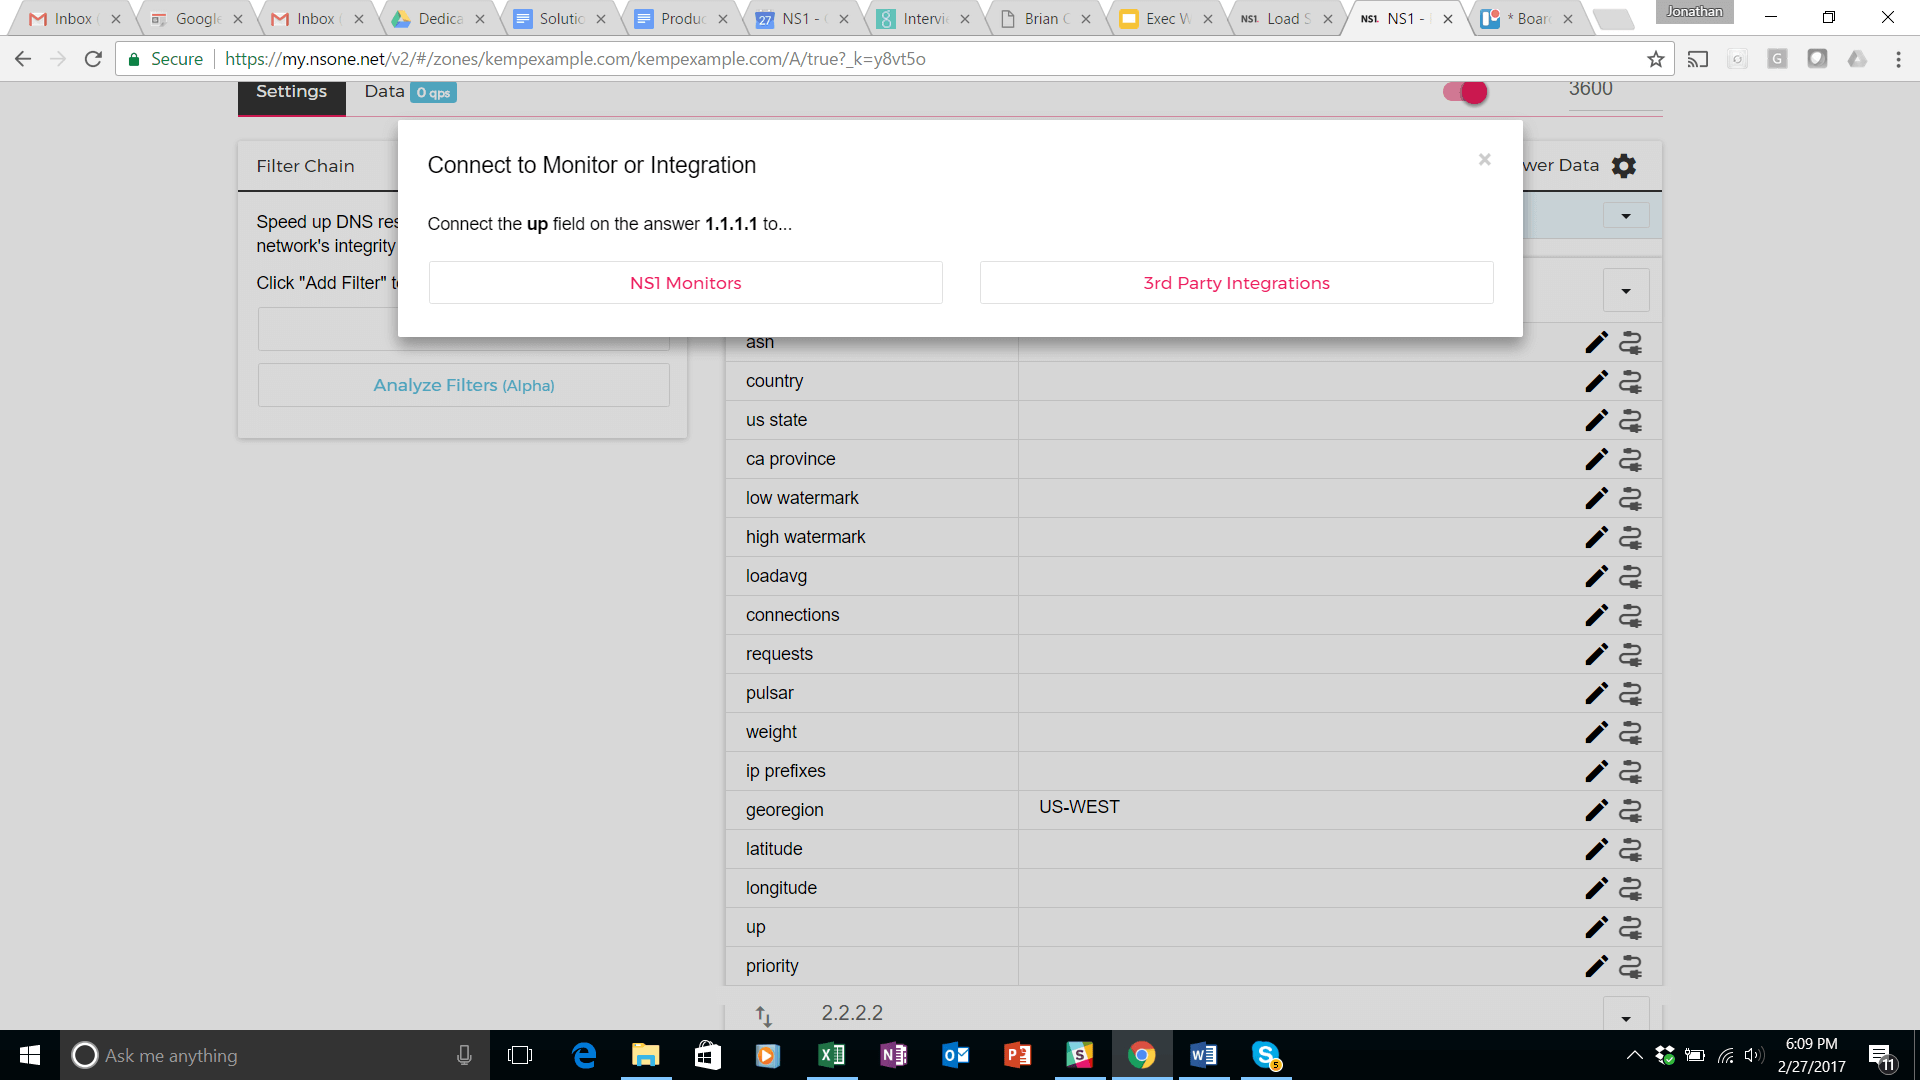
Select the NS1 Monitors from the pop up that appears at the top of your screen. Select the Kemp US West monitor. It will then appear in the UP setting of the 1.1.1.1 answer in the DNS record. Perform the same steps to create a monitor and attach it to the 2.2.2.2 answer (Atlanta data center).
At this point your record should look like this:
The final step in attaching metadata to the answers is to set up a data feed to push load information from each of the Kemp load balancers to the corresponding DNS answer.
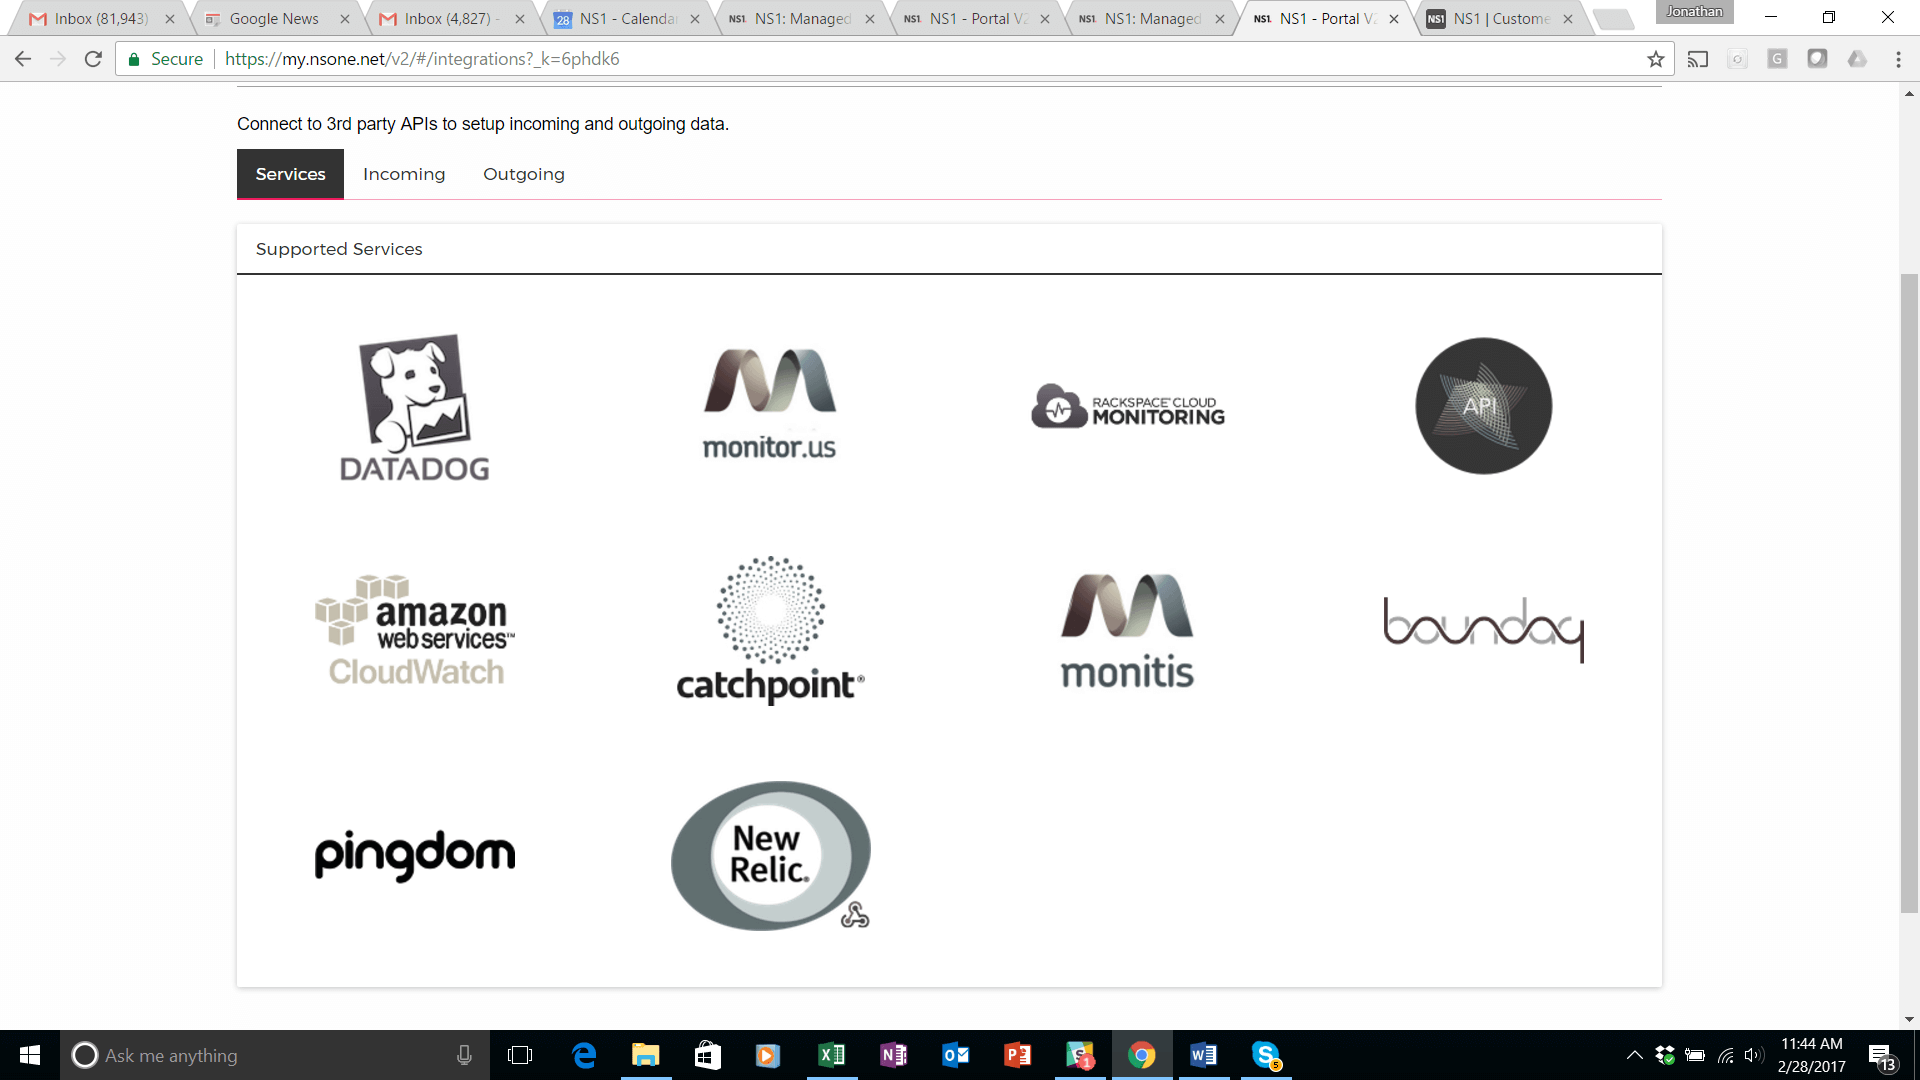
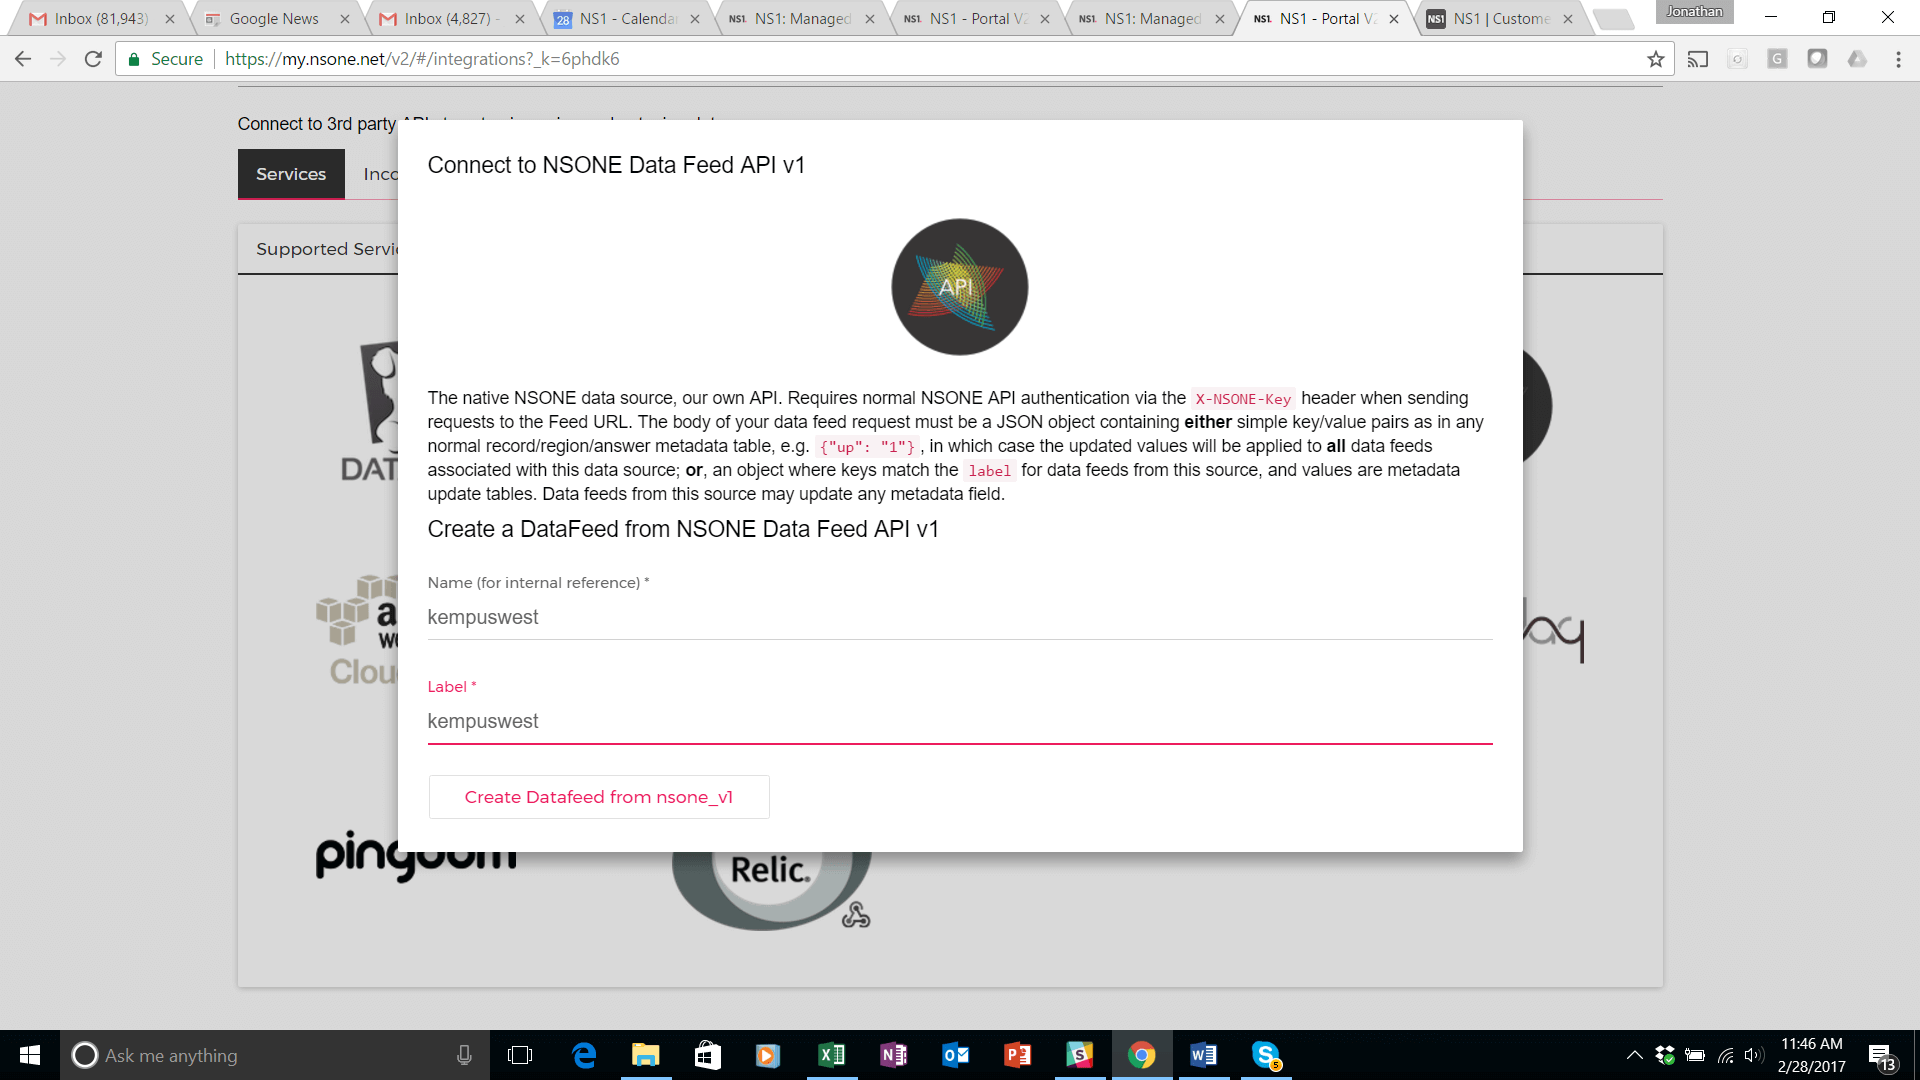
To set this up, navigate to the ‘Integrations’ tab of the portal, click on “Services” and click on the ‘Incoming Data Feeds’ with the API label. A config pop up will appear.
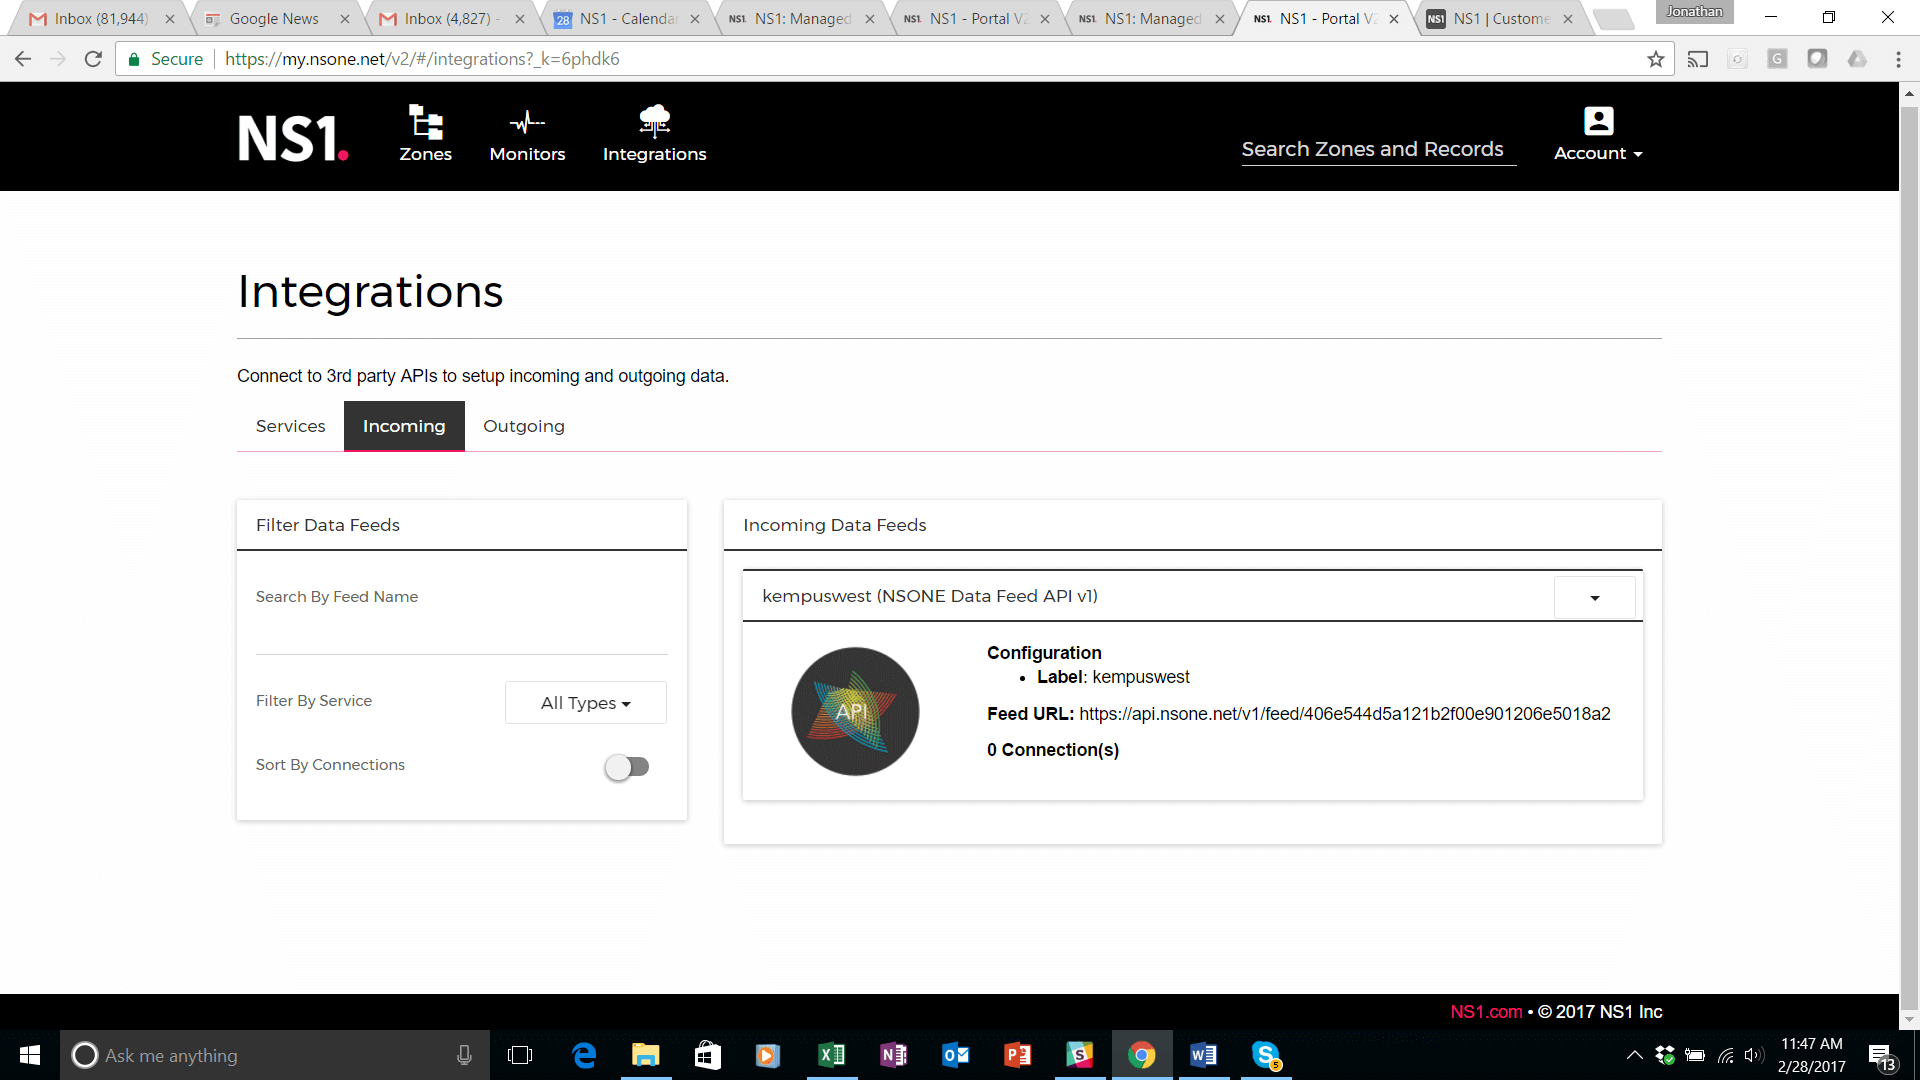
This step has created a unique URL (see screen shot above) that can be used to send data from an external source to the NS1 platform. This data feed will be connected to the answer (1.1.1.1) corresponding to the us west data center.
Create a second data feed for the Atlanta data center (2.2.2.2). Call it Kempuseast.
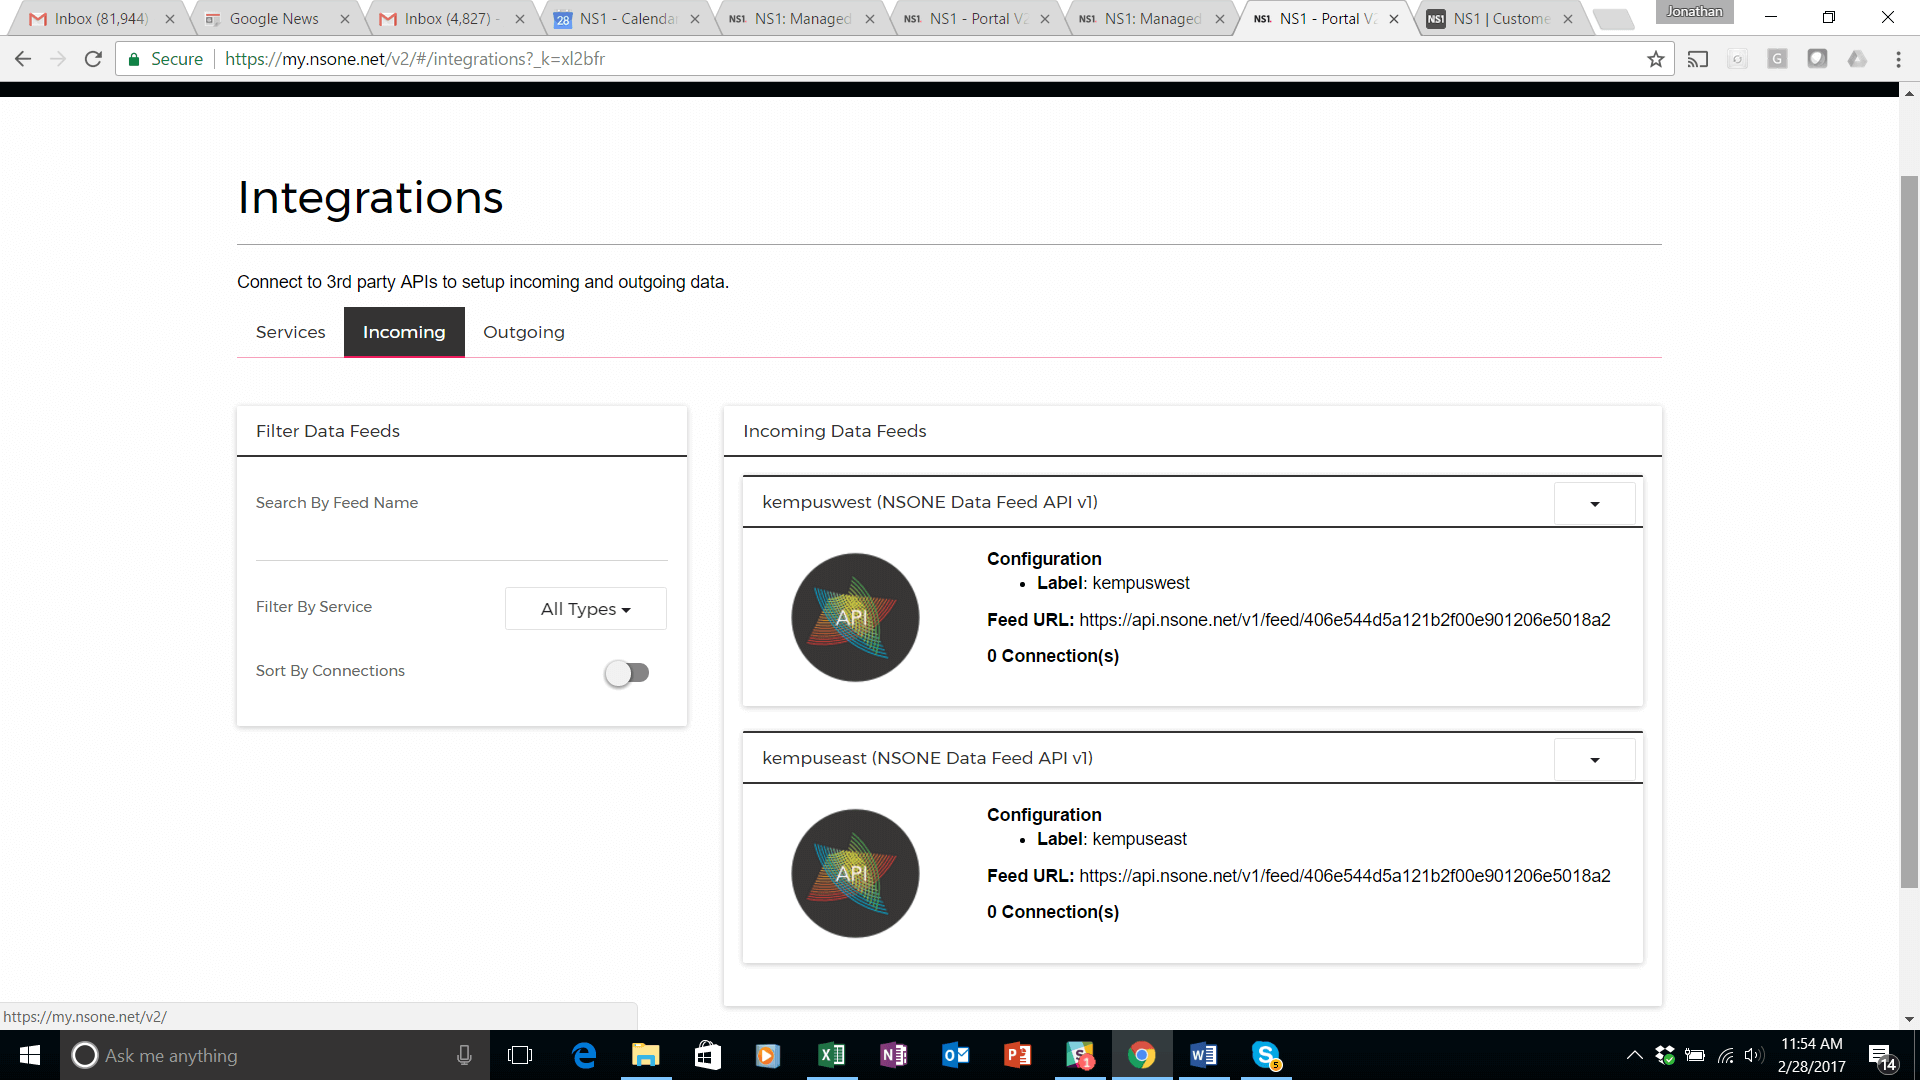
Give the data feed a label (as shown above) and click Create. The data feed appears on the next screen.
Go back to your DNS record, select the 1.1.1.1 answer and under settings, choose Connection Count. Click on the la-datacenter data feed that appears in the pop up to attach it to connection count for this answer.

Next step is to configure a high and low water mark that will be compared with the actual number of connections reported by the data feed from the load balancers. In the DNS record, in settings, use the pencil icon to assign a low water mark and high water mark to the 1.1.1.1 answer. The record will appear as follows:
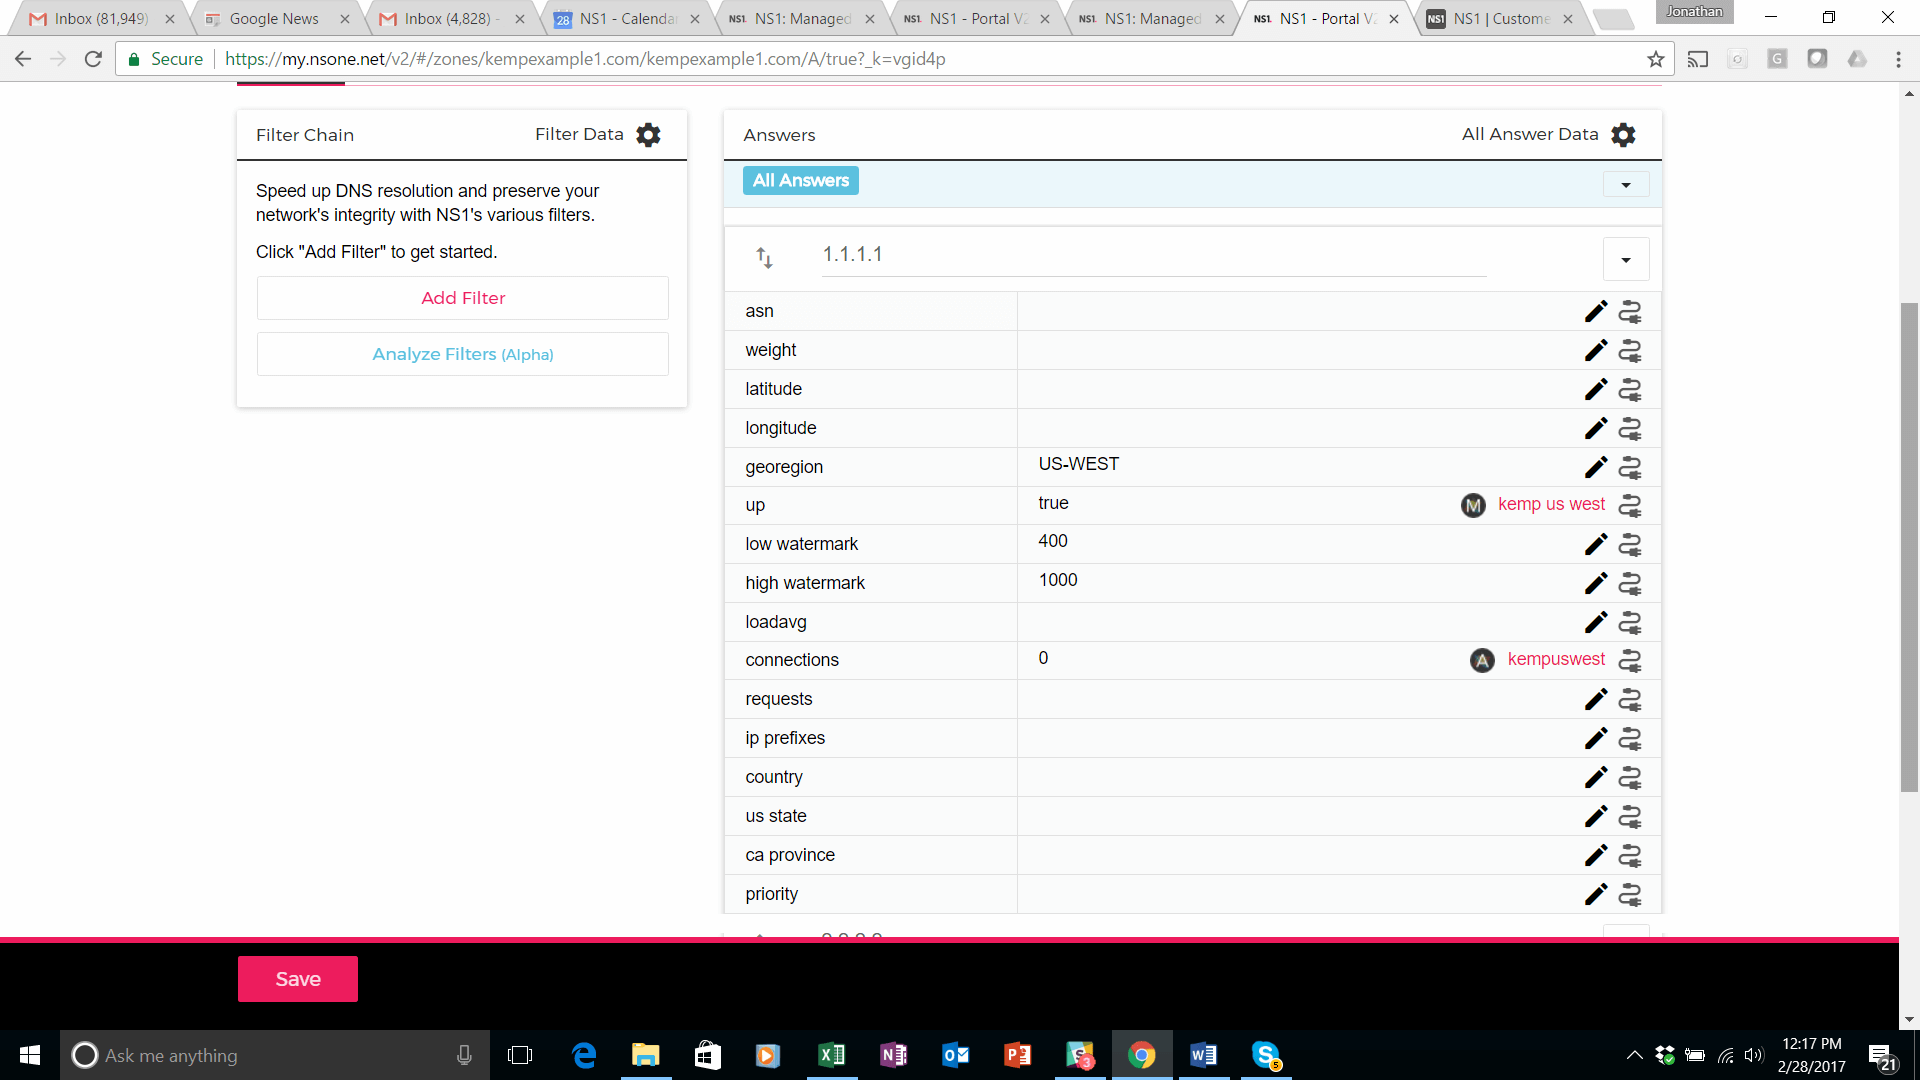
The low water mark represents the point at which the DNS will begin to redirect some of the traffic away from this answer, by comparing the number of connections coming from the data feed to the low water mark. The high water mark represents a level at which all traffic will be steered away from this location.
Repeat to connect the Kempuseast data feed for the Atlanta data center at 2.2.2.2. and set up the low and high water marks.
Step 3: Set up the Filter Chain
In this final step of the set-up procedure, the NS1 filter chain is configured to steer traffic to these data centers in accordance with the traffic management logic described at the beginning of this solution guide.
- Configure up/down filter. This removes any down data center from further consideration.
- Configure Geo routing filter to select the answer that is closer to the end user.
- Configure load shedding. The load shedding filter compares the load as reported by the data feeds coming from the load balancers to the low and high water marks associated with the DNS answer. It progressively steers traffic away from data centers as their load approaches the high water mark. This filter will ensure a better distribution of traffic amongst the 2 data centers
The configuration steps are as follows:
From the screen displaying the Kempexample.com record, click on the add filter box at the left-hand side of your screen.
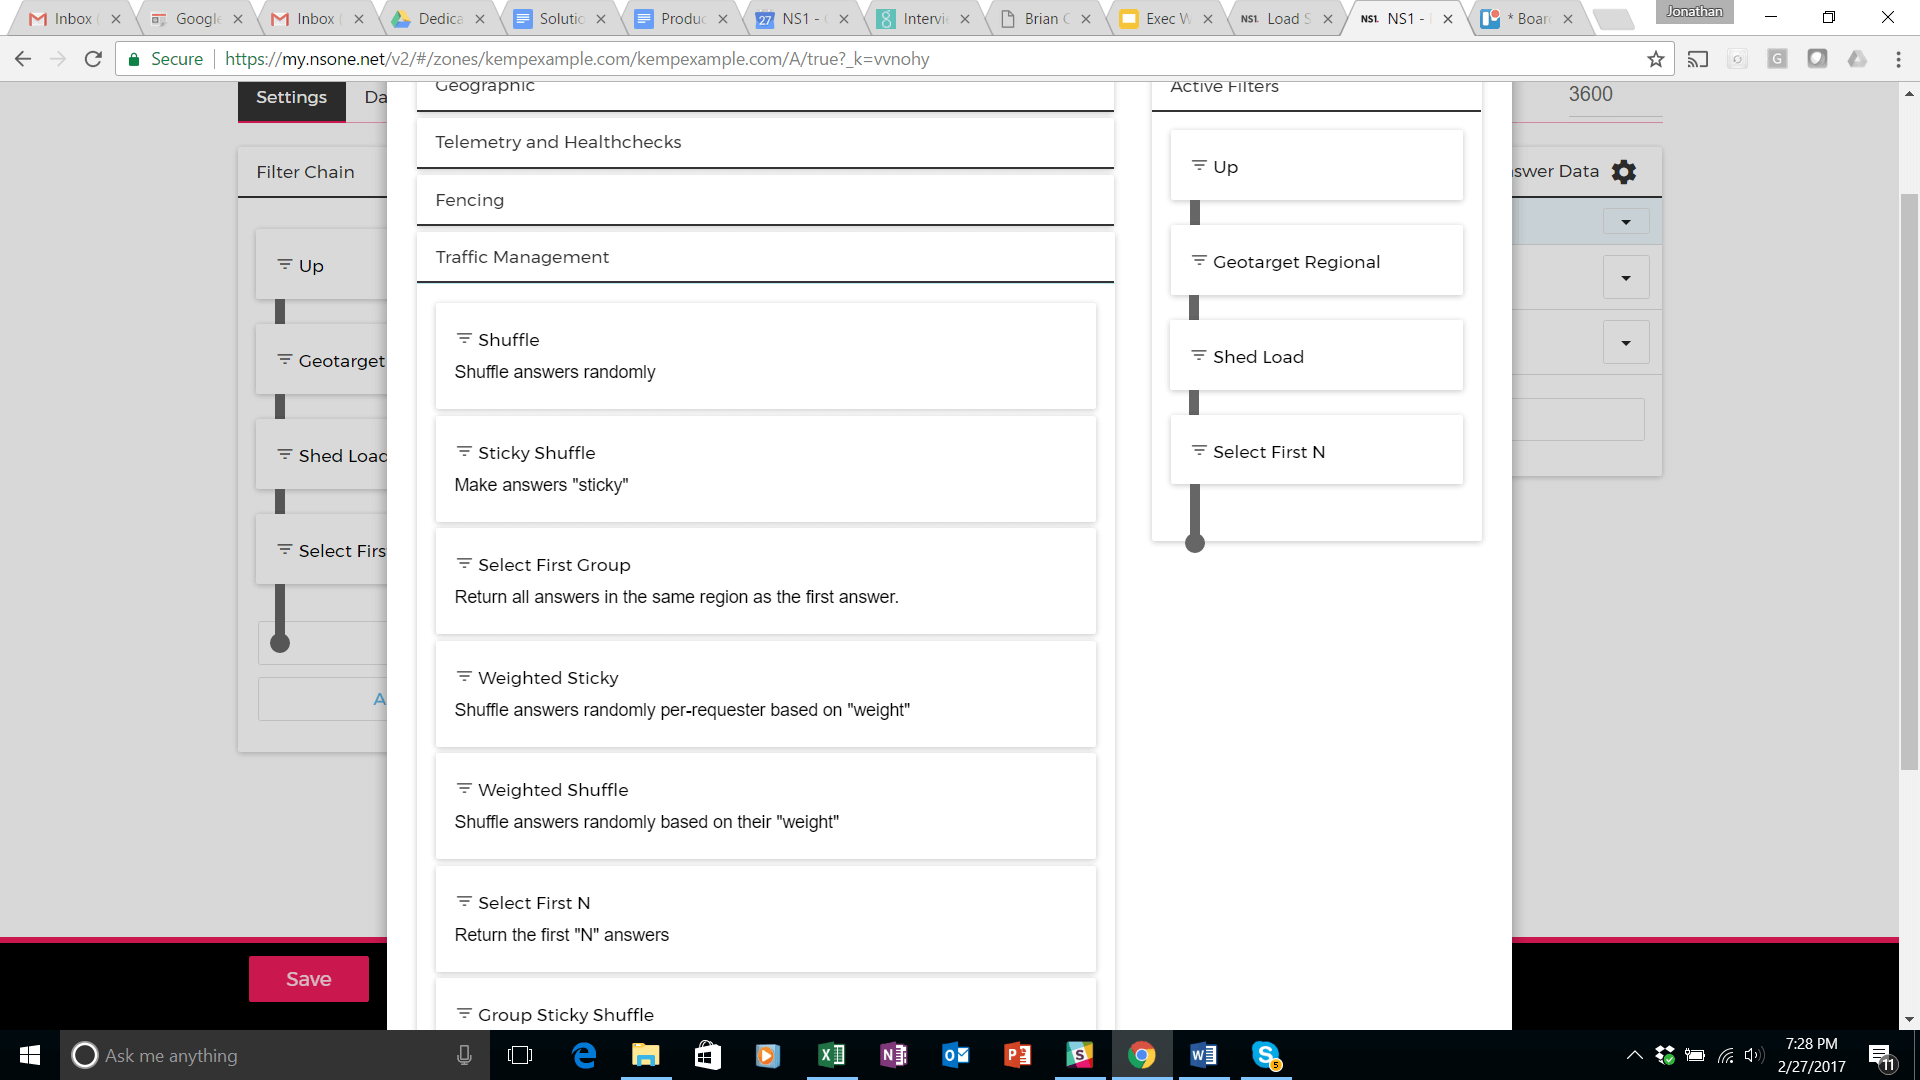
A pop up appears with several selections. Choose Telemetry and Health Checks
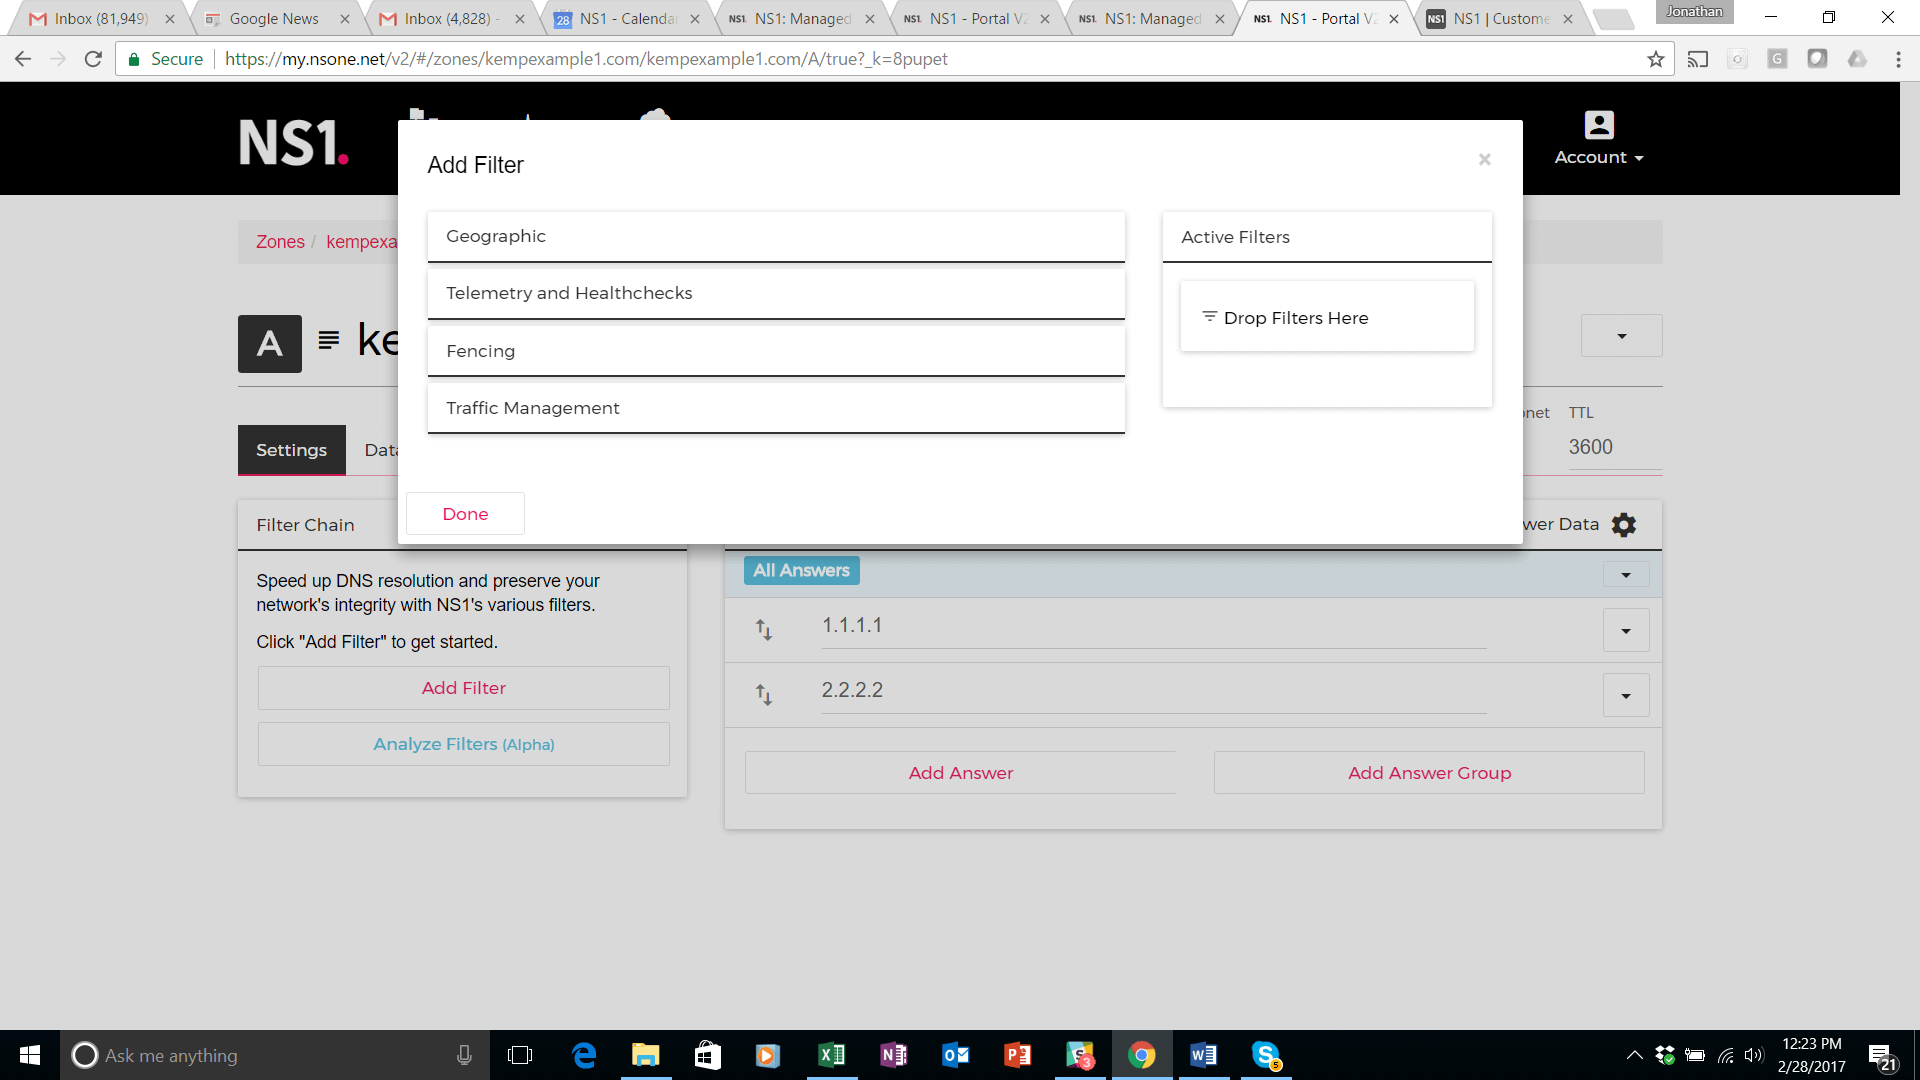
Drag the UP filter to the right, dropping it in the Drop Filter Here box. Then drag Shed Load to the right.
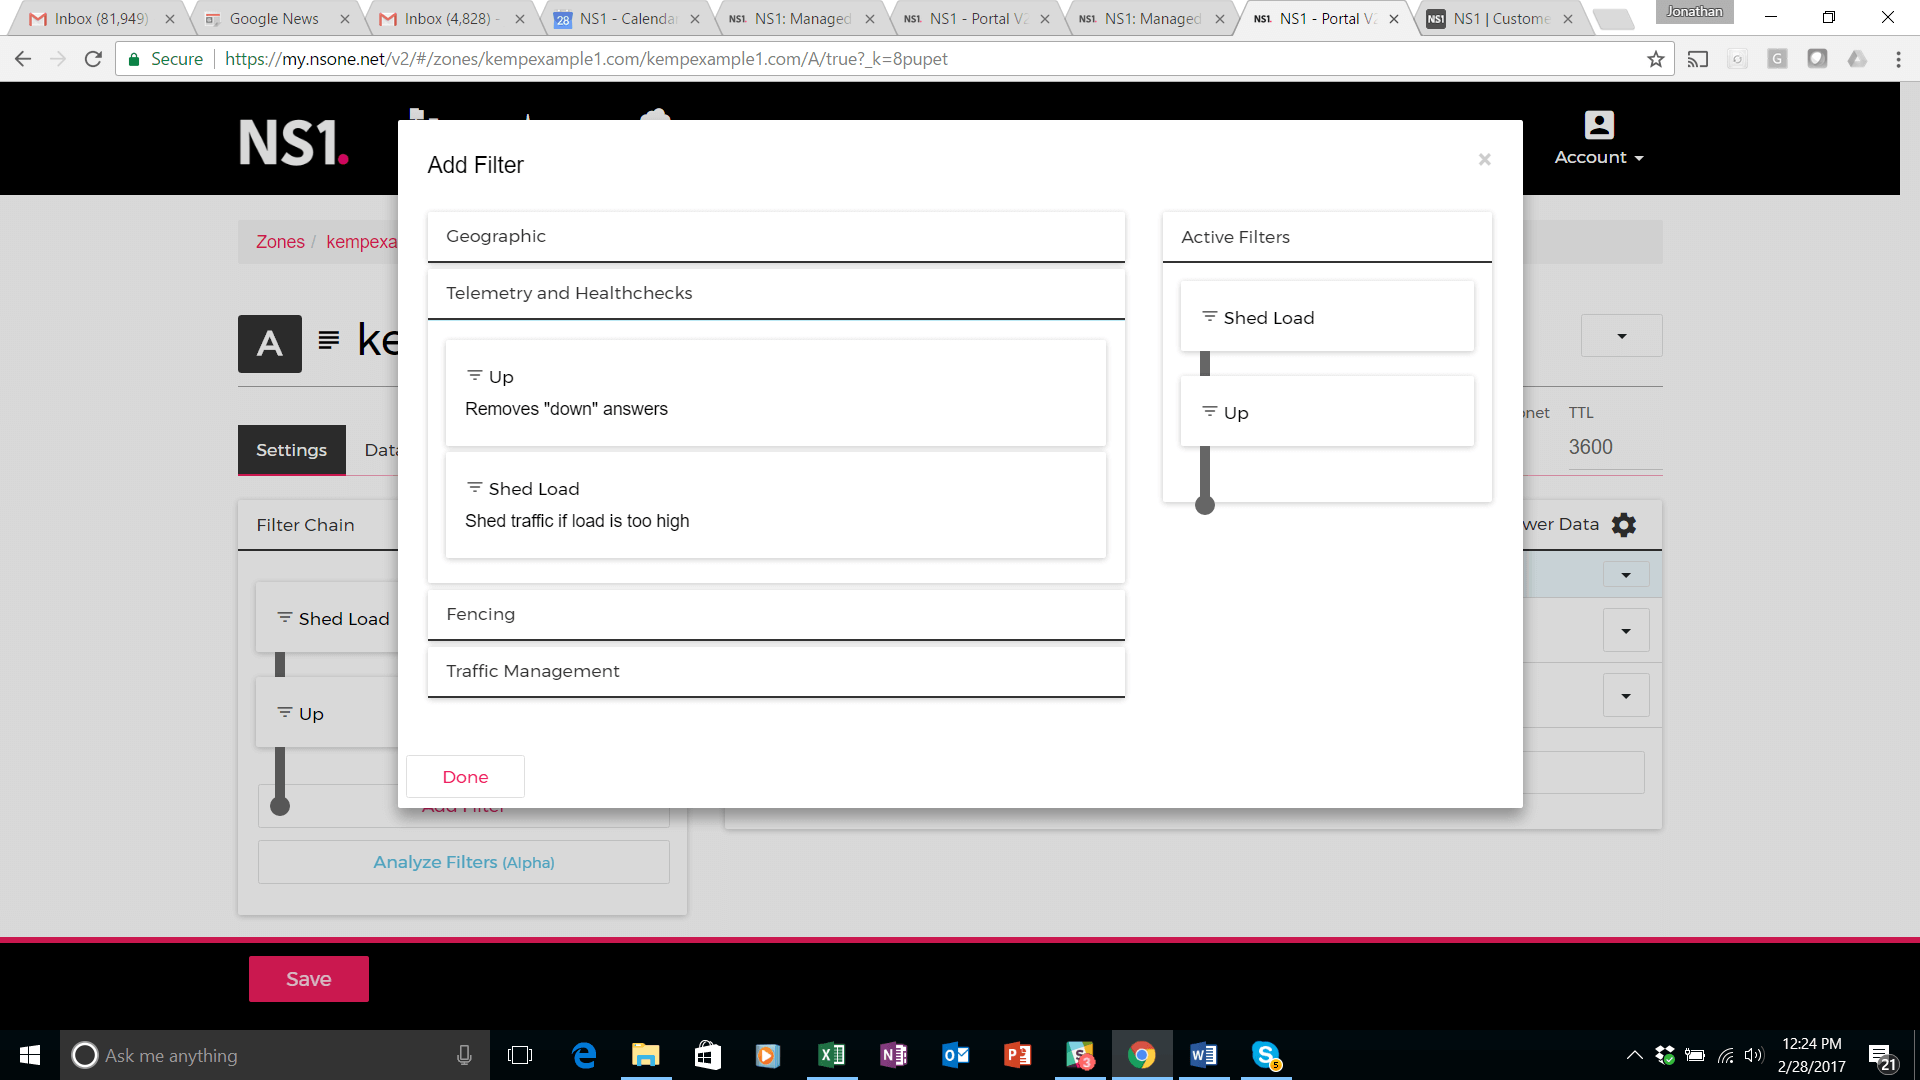
Next, move the Shed Load filter to the right.
Then select the Geographic option from the Add Filter box and move Geotarget Regional to the right.
Under Traffic Management move the Select First N filter and drop it on the right-hand side
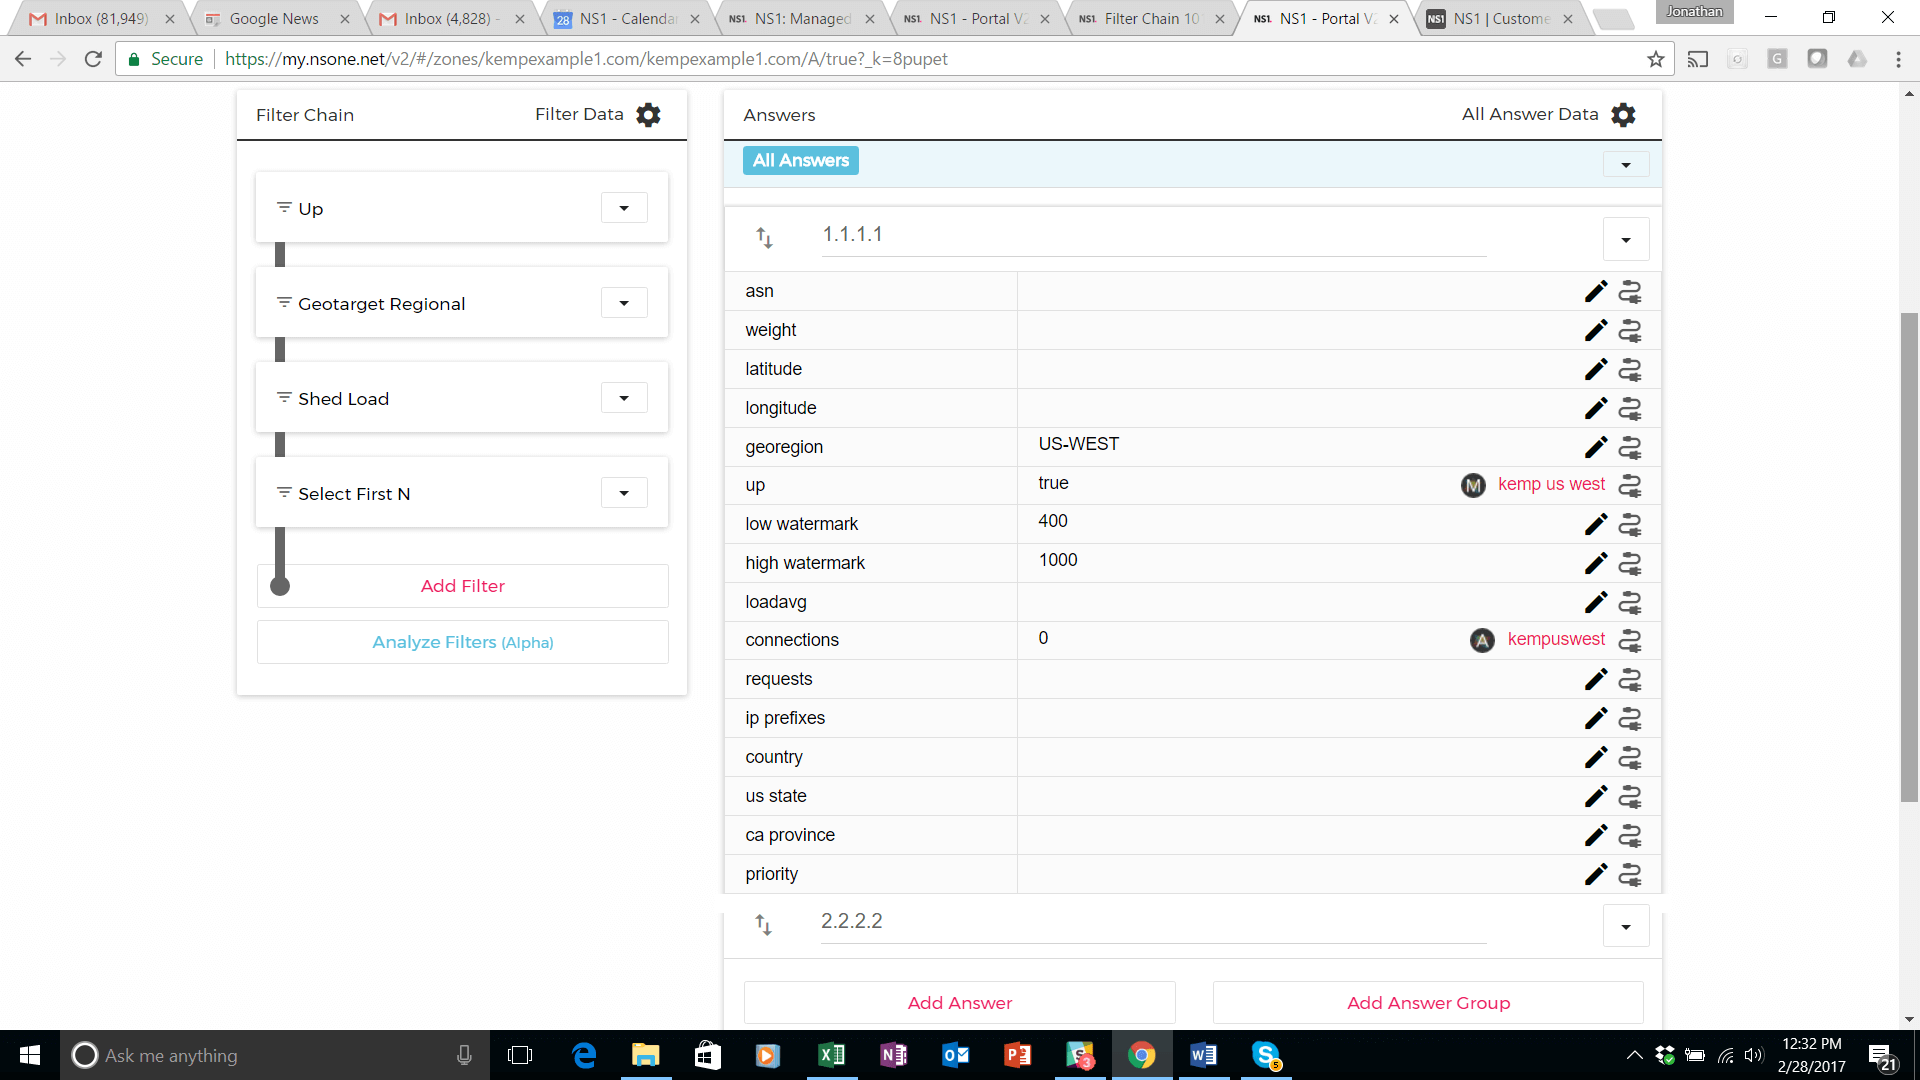
Reorder the filters on the right in the order of UP, GeoTarget Regional, Shed Load, Select First N (see below).
Click Save.
Your set up should look like this:
Step 4: Set up the Feed from Kemp Load Balancers
At this point, the set up is configured to receive data reporting load from the Kemp load balancers. For that to occur, a POST command needs to be sent to the URL that was generated when you created the data feed. The URL is shown in the incoming data feeds you created in Step 2. The format of this command is as follows:
$ POST -H "X-NSONE-Key:" -d '{"Kempuswest":{"connections":}}'
The NSONE-Key is an API key that you create under account/settings in your NS1 account. The key authenticates the API request. The is the number of connections reported by the load balancer.
The LoadMaster can provide this information via its REST API. You can find the Kemp API documentation here: https://docs.progress.com/bundle/loadmaster-interface-description-restful-api-ga
In the example above, the relevant API call is: stats
This returns XML from the LoadMaster that would look something like this excerpt (irrelevant tags excluded):
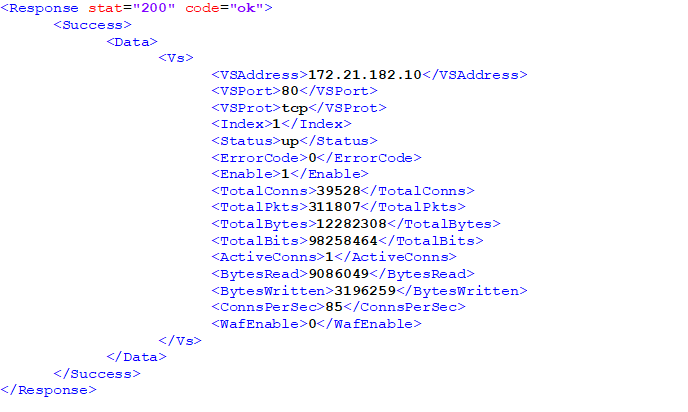
The field we are interested in for the purposes of our example here is:
<ActiveConns>
Kemp also provides a Python SDK for the LoadMaster, available here:
https://pypi.python.org/pypi/python-Kemptech-api
This allows a straightforward call that can return any metric of interest.
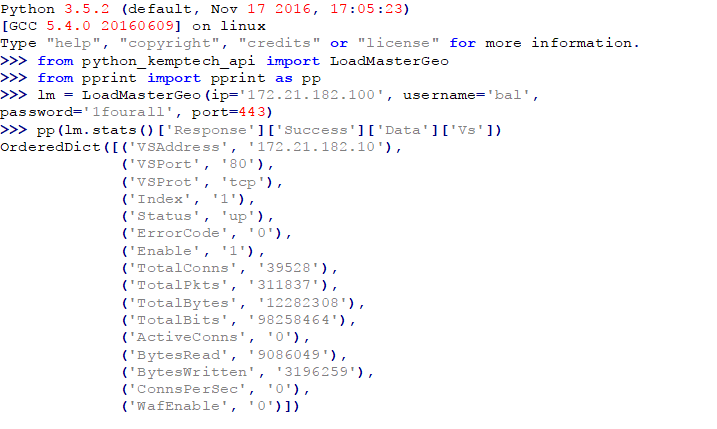
You can find more information about the Python SDK here:
https://Kemptechnologies.com/blog/getting-started-Kemp-python-sdk
We can now use this data to feed our call to NS1.
Step 5: Test the Set Up
There are a couple of ways to test whether the configuration is achieving the desired result. One way would be to use the API script below in order to push the amount of connections to each of the data centers that you created feeds for, using the snippet of code below:
$ curl -X POST -H "X-NSONE-Key:" -d '{"Kempuswest":{"connections":600}}'
Feed URL: https://api.nsone.net/v1/feed/406e544d5a121b2f00e901206e5018a2
Following, you can use the below to query the domain 100 times and see the shift in how many queries are being answered to each data center based on the connection metric you are pushing.
$ for i in {1..100}; do dig +short www.Kempexample.com. @dns1.p01.nsone.net.; done | sort | uniq -c
For your testing purposes, you might want to issue multiple DIG commands from multiple IP addresses, while varying the load reported by the load balancers. Consult the NS1 knowledge base for more detailed information about how to use DIG to test your DNS set-up.
Conclusion
This guide shows one example of how NS1 can be used in conjunction with Kemp to deliver a globally load balanced traffic management solution. Because of the flexibility to receive incoming meta data and the versatility of the NS1 filter chain to act on the data, there are many more use cases that can be supported. Other use cases include:
- Multiple data center load balancing
- Policy based traffic management
- Data center migration
Contact your NS1 or Kemp representative to discuss your specific needs.
