Sometimes, when you are trying to provision something in a test environment, lab or as a POC , the provisioning process for a load balancer could take longer than planned. Kemp LoadMaster is designed to be a very agile and flexible solution and supports a number of different hypervisor and cloud platforms including Hyper-v, VMware, KVM, Nutanix, Microsoft Azure and AWS clouds.
- Instead of focusing on deployment requirements, I will demonstrate a very simple and straight forward method to automate the provision of a Virtual LoadMaster in Hyper-V in 3 steps: Download Virtual LoadMaster at Virtual LoadMaster Free Trial and download a VLM for Hyper-V image.
Note: you will need a Progress ID – here’s how to get it –
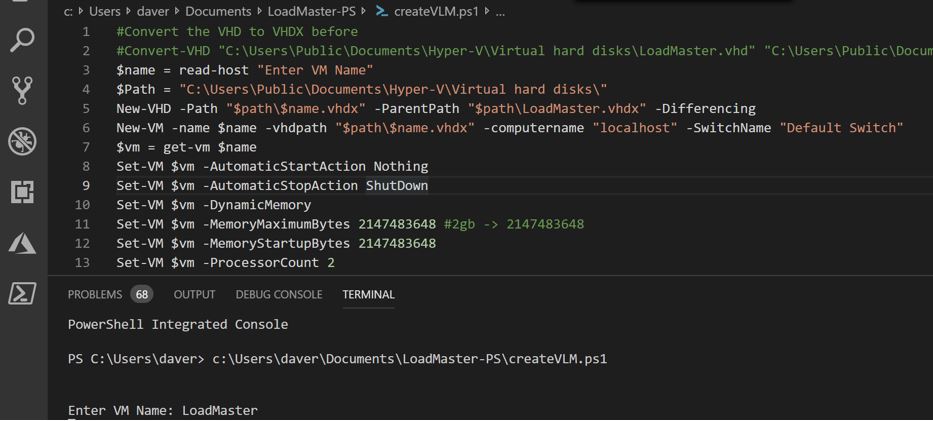
Next, open PowerShell or Visual Studio Code with Powershell Extension and Admin privileges and convert the VHD to VHDX with the line below:
#Convert the VHD to VHDX

#Convert-VHD "C:\Users\Public\Documents\Hyper-V\Virtual hard disks\LoadMaster.vhd"

"C:\Users\Public\Documents\Hyper-V\Virtual hard disks\LoadMaster.vhdx"
Provide the directory where the VHD is located and then provide the location where you want to store the vhdx.
- Now you need to provide the minimum resources that you’ll need to spin up a Virtual LoadMaster. As a default we assign 3Gb of RAM however you can add more if you prefer:
$name=read-host"Enter your LoadMaster Name"

$Path="C:\Users\Public\Documents\Hyper-V\Virtual hard disks\

"New-VHD-Path"$path\$name.vhdx"-ParentPath"$path\LoadMaster.vhdx"-Differencing

New-VM-name$name-vhdpath"$path\$name.vhdx"-computername"localhost"-SwitchName"Default Switch"

$vm=get-vm$name

Set-VM$vm-AutomaticStartAction Nothing

Set-VM$vm-AutomaticStopAction ShutDown

Set-VM$vm-DynamicMemory

Set-VM$vm-MemoryMaximumBytes2147483648#2gb -> 2147483648

Set-VM$vm-MemoryStartupBytes2147483648

Set-VM$vm-ProcessorCount2

Start-VM$vm
You will be prompted to enter a name for the new Virtual Machine:

Result:
Here is an example of the output:
 Size:17179869184
MinimumSize:16779313152
LogicalSectorSize:512
PhysicalSectorSize:512
BlockSize:2097152
ParentPath: C:\Users\Public\Documents\Hyper-V\Virtual hard disks\LoadMaster.vhdx
DiskIdentifier: 058C5030-9345-44E5-ACDC-7AABB2286AC9
FragmentationPercentage :
Alignment:1
Attached: False
DiskNumber:
IsPMEMCompatible: False
AddressAbstractionType : None
Number:
Name: kemp-loadmaster
State: Off
CpuUsage:0
MemoryAssigned:0
MemoryDemand:0
MemoryStatus:
Uptime:00:00:00
Status: Operating normally
ReplicationState: Disabled
Generation:1
 Note: I am using the “Default switch”, you might want to update it with your own configuration. Next go to your Hyper-V manager and you will see your LoadMaster running, just connect to the console.

Right-click on the LoadMaster VM and select “Connect”:

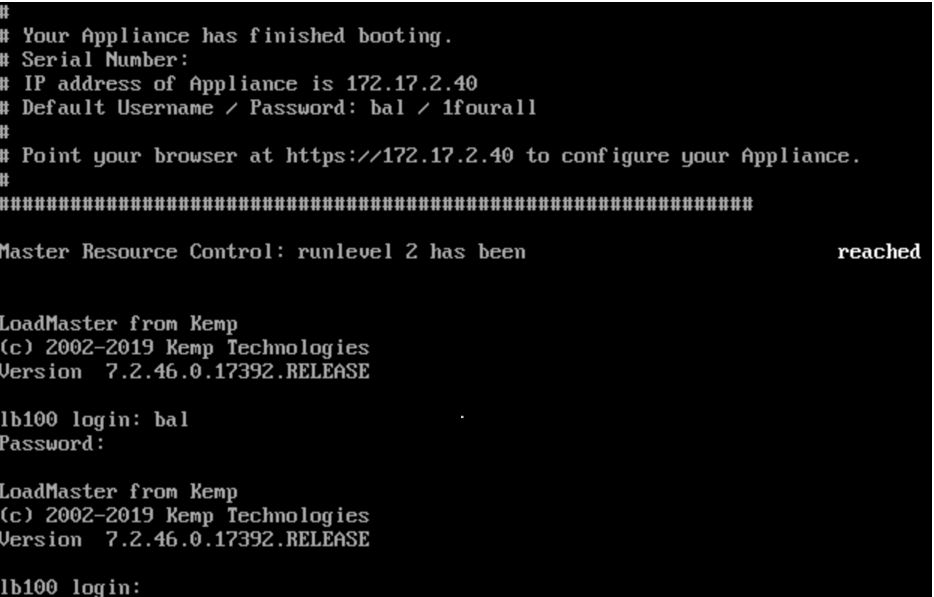
You should see the console below, default credentials which are:
User: bal Pass: 1fourall

Proceed to the license agreement and you are good to start the test environment!

