Progress Kemp LoadMaster Deployments on Proxmox VE

Proxmox is a server virtualization and management platform designed for running and managing virtualized IT infrastructures. The Proxmox Virtual Environment (Proxmox VE) offers full virtualization with KVM (Kernel-Based Virtual Machine) integration and container virtualization.
The Proxmox VE storage model is very flexible and supports various storage types, each with its own capabilities and supported disk image formats. In this blog post, we walk you through different deployment options for Progress Kemp LoadMaster load balancers on Proxmox VE.
Before we dive in, understanding the different types of storage and their supported disk formats is crucial to deciding the best approach to deploying LoadMaster load balancers. There are basically two different types of storage:
- File-level storage: Uses a full-featured file system, making it very flexible. You can save any type of content on it.
- Block-level storage: Used mainly to store large raw disk images. You usually can’t store other files like ISOs or backups here. Most modern block-level storage can also support snapshots and clones.
LoadMaster Deployment Using the Open Virtualization Format (OVF) and Virtual Machine Disk (VMDK)
In the first deployment scenario, we will use a LoadMaster VMware image for deployment. Follow the steps below once you have the image downloaded.
1. Connect to Proxmox via SSH or console.
2. Create a new directory in one of the Proxmox File Storage types that is compatible with backup, ISO image, etc., for example, the default “local” storage. If the “local” storage is chosen to be used, the new directory must be created on the default path /var/lib/vz, for example, “upload.”
3. Connect to the Proxmox server/cluster using any SCP or SFTP tool, such as WinSCP. Now, from the extracted VMware LoadMaster image, upload the .ovf and .vmdk into the directory created in the previous step.
4. Return to the Proxmox SSH session or Web Console. Navigate to the directory created in the second step.
5. The disk must be imported into a storage type that supports VM images, such as “local-lvm”. In this case, the “local-lvm” storage only supports the “raw” format for the VM disk, and as such, the OVF/VMDK must be converted to the raw format.
The generic CLI command is:
qm importovf vmid source_ovf_file_name TargetStorage --format raw
Real example:
qm importovf 401 LoadMaster-VLM-7.2.62.ovf locallvm --format raw
This command will convert the OVF and VMDK image to a raw format and import it to its destination. This will also create the VM based on the information in the OFV file.
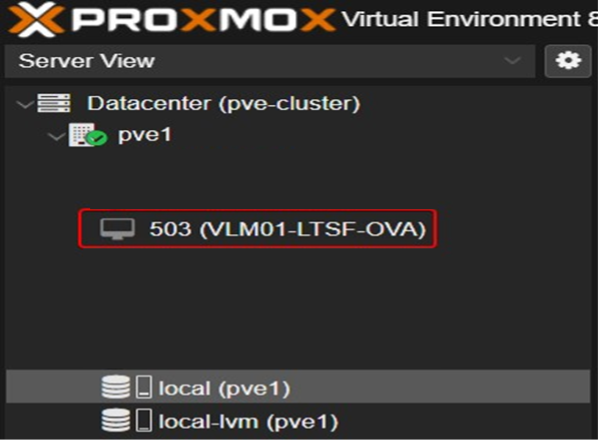
6. Before powering up the LoadMaster for the first time, confirm if the following configurations are applied. Navigate to the Proxmox WUI and click on the newly created, as per the real example above, “VM ID:401” to open its properties.
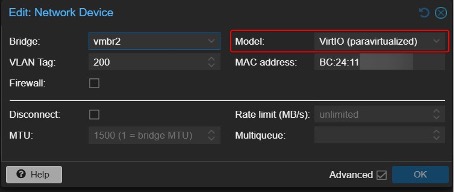
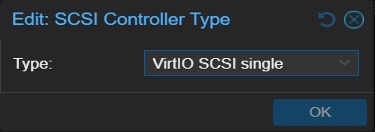
7. Navigate to the Hardware tab to make the following changes: Add Network devices (vNIC) and configure them accordingly to the network requirements. By default, the LoadMaster image is deployed with 2 vNICs. So, I added 2 vNICs, but it is not a requirement. It is important to choose the device model/driver. I have chosen the “VirtIO (paravirtualized)” as this gave the best network performance for the LoadMaster VM. The SCSI Controller also must be changed from the default “LSI 53C895A” to “VirtIO SCSI single”.
8. The LoadMaster solution can be started and configured via the LoadMaster WUI.
LoadMaster Deployment Using an Open Virtualization Appliance (OVA) File
Proxmox VE offers an integrated VM import wizard that simplifies migrating virtual machines from VMware ESXi to Proxmox. This feature was introduced in Proxmox VE 8.2, streamlining the process, reducing downtime and potential errors associated with manual migration.
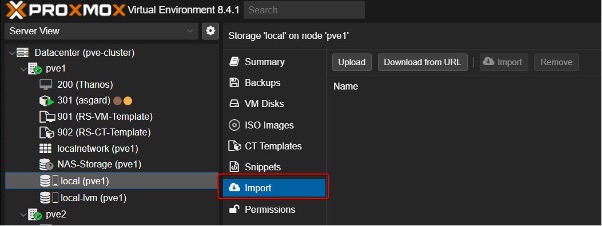
Note: The “Import” feature needs to be enabled in the storage so that it can be used. It is also only possible to enable this in a file-type storage.
Converting the OVF to OVA
The LoadMaster VMware image is composed of two files: the OVF and the VMDK. So, although we can upload the VMDK using this method, the VMDK on its own cannot be used to deploy the LoadMaster solution. As it’s impossible to import the OVF file using this method, the LoadMaster VMware image must first be converted to OVA format, which would combine both files (OVF+VMDK). For this, I used a VMware tool called ovftool from this website here.
After installing the “ovftool” application, the following command can be run for the application directory, in my case “C:\Program Files\VMware\VMware OVF Tool”.
ovftool.exe “path of the OVF source” "destination path to save the OVA file"
Real example:
ovftool.exe “C:\ LM_Images\LTSF - 7.2.54.14\LoadMaster-VLM-7.2.54.15.ovf”
" C:\LM_Images\LTSF - 7.2.54.14\LoadMaster-VLM-7.2.54.15image.ova"
Uploading the OVA file to Proxmox
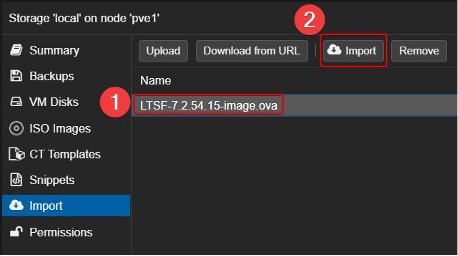
1. Click the “Upload” button and find the OVA file location.

2. Click “Upload.”
3. Click on the uploaded OVA image so that it can be imported.
4. In the “Import” feature wizard, modify the “General” and “Advanced” parameters accordingly.
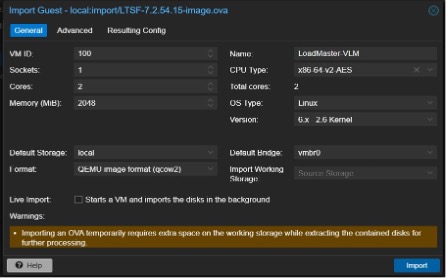
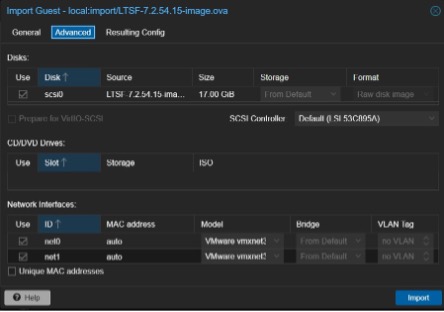
Below are the default parameters based on the Proxmox environment.
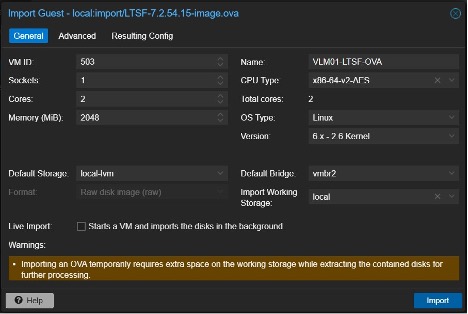
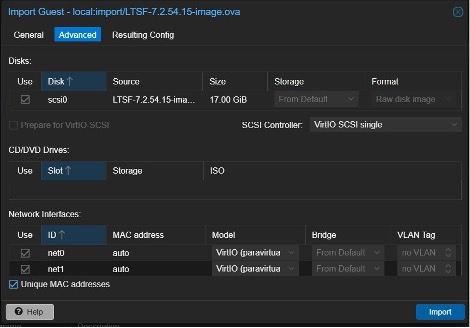
Below is an example of changes that suit this specific Proxmox environment.
Notes: In the “General" tab, the “Default Storage” means the target storage. However, the “Importing Working Storage” means the storage that will be used to process the image for importing it. There is a requirement that File-type Storage must be used for the “Importing Working Storage.”
In this scenario, in addition to changing the target storage and the working storage in the General Tab, we have also modified the VM ID, Name and Default Bridge (network).
Next, under “Advanced”, change the SCSI controller to “virtIO SCSI single” as this works better. We may also include the VLAN tag relevant to each interface, but here, we have changed the Network driver to “VirtIO (paravirtualized)”.
5. Clicking the “Import” button after reviewing the settings will create the VM.
Note: After VM creation, additional modifications can be made via the VM control panel. For example, here, Proxmox uses NVMe storage. To improve the device’s IO performance, we enabled “Discard,” “SSD emulation,” and “IO thread.”
6. The LoadMaster solution can be started and configured via the LoadMaster WUI.
LoadMaster Deployment Using the LoadMaster KVM Image
The LoadMaster image for KVM deployments uses a .disk extension, which is not natively supported by Proxmox. However, if the file is placed in a directory within the hypervisor’s storage, it may be possible to convert it to another format using utilities available in Proxmox. As the specific command could not be identified, an alternative method involved using the QEMU disk image utility for Windows, which is available here. This tool supports converting, creating and checking various virtual disk formats, and is compatible with Hyper-V, KVM, VMware, VirtualBox and Xen virtualization platforms.
Converting the .disk to qcow2
The qemu-img for Windows does not require installation and once extracted, it can be used from the same directory. However, it is important to mention that it does not work when using the PowerShell shell, but it works if the commands are entered in the old CMD shell. The commands used for the conversion are as follows:
qemu-img.exe convert source.img -O qcow2 dest.qcow2
Real example:
qemu-img.exe convert “C:\LM_Images\GA - 7.2.62.0\LoadMasterVLM-7.2.62.0.22915.RELEASE-Linux-KVM-XEN.disk” -O qcow2
"C:\LM_Images\GA - 7.2.62.0\LM-7.2.62.0.qcow2"
Creating the VM for the LoadMaster Load Balancer
The qcow2 image is only the disk that holds the data of the VM, and the deployment differs from an OVF/OVA deployment, which also contains details of how the machine should be deployed. So, in this case, the VM must first be created and then the qcow2 disk attached to it.
Here are the detailed steps of how the VM should be created via the Proxmox WUI:
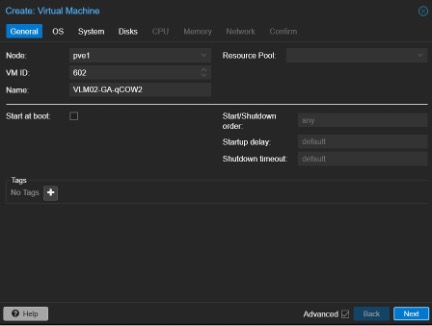
1. Click Create VM
2. Configure the “General” tab. In this step, the Proxmox node must be chosen, the VM ID must be entered (must be unique), note that Proxmox will default to the next available VM ID. VM name must be entered as well.
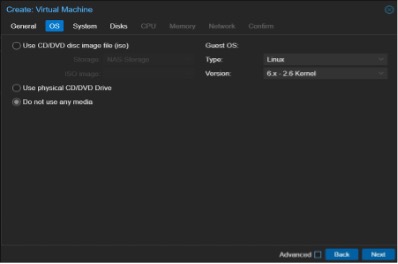
3. Configure the “OS” tab. Same as screenshot.
4. Configure the “System” tab. The defaults are suitable for the LoadMaster solution. Note: as the LoadMaster load balancer doesn’t not have the Qemu Agent installed in it, the check box must be left unticked.

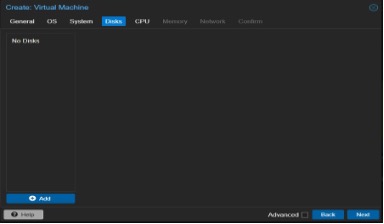
5. Configure the “Disk” tab.
The VM creation wizard will create one disk (see screenshot).
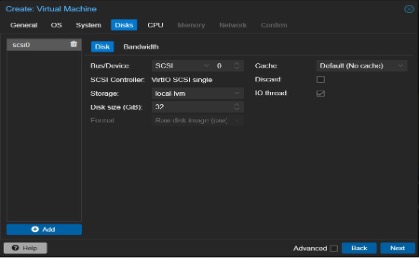
However, the disk must be removed as we are going to attach the converted qcow2 disk image instead.
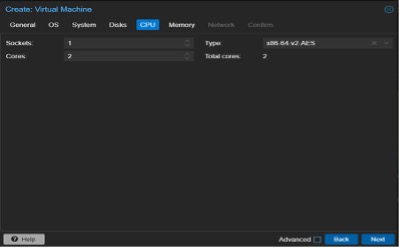
6. Configure the “CPU” tab. Proxmox offers various CPU types, with the default recommended option being sufficient for most needs. Core count is also adjustable.
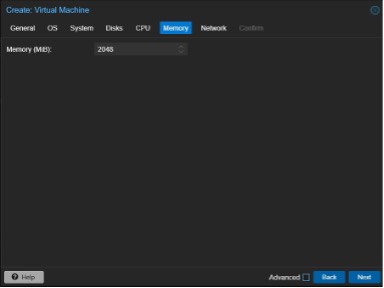
7. Configure the “Memory” tab. Can be adjusted as required.
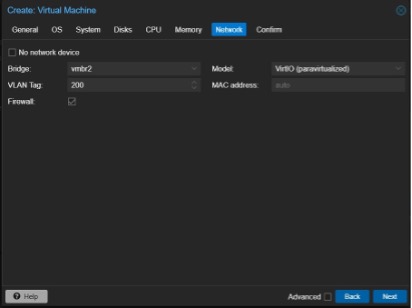
8. Configure the “Network” tab. When creating a VM in Proxmox, only one vNIC can be created, but after that, many others can be added. The important setting here is the “Model,” VirtIO (paravirtualized) is recommended, at least as per the current Proxmox version. The Bridge must be chosen per the requirement, and a VLAN tag can be added if needed.
9. Review the “Confirm” tab and click Finish.
Importing qcow2 disk image to Proxmox
Once the VM has been created, the qcow2 disk must be imported to Proxmox. This can be achieved with any Linux file transfer utility or Windows file transfer software. In this case, we used the WinSCP software. Below are the steps taken.
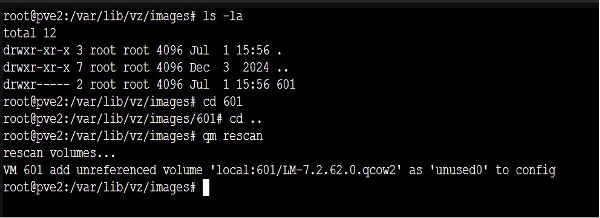
1. Navigate to the correct storage path. During this step, we use the default Local storage and the path is /var/lib/vz/images. It is important to highlight that qcow2 disk images can only be used with the File Storage Type.
2. Create a directory with the same name as the VM ID assigned above. In this case, the VM ID assigned was 601.
3. Import the qcow2 disk to the directory created above.
4. From the command line or SSH, change the permission to the directory to 740. Example: chmod 740 601 or chmod g-wx 601;chmod o-rwx 601. From the same bash terminal, the command qm rescan must be performed. The following output must be observed.
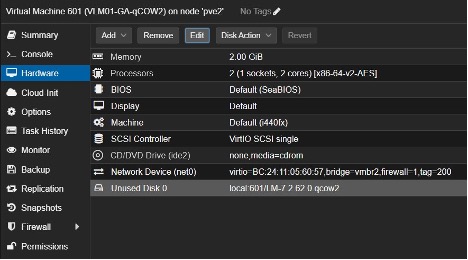
5. Return to the Proxmox WUI and navigate to the “Hardware” tab of the VM. The disk can now be seen, but it is still unused. Select the unused disk and click Edit.
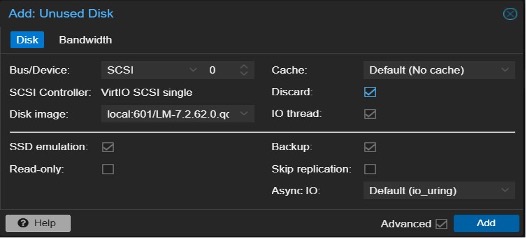
6. Click “Add” to initialize the disk. The default configuration should work but any other configuration is possible at this stage. Here, we enabled “Discard”, “IO thread”, and “SSD emulation”. The options “Discard” and “IO thread” provide the OS information on its capability and it is up to the OS whether to use it or not.
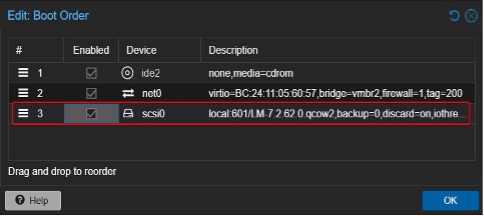
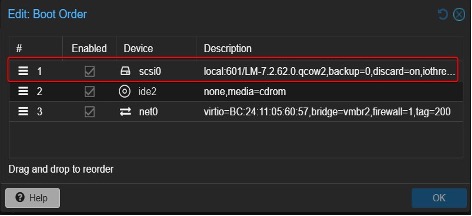
7. Navigate to “Options → Boot Order” and click Edit.
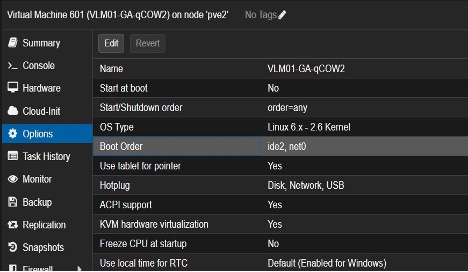
8. Enable the disk and change its position.
9. The LoadMaster VM is ready to be started and initially configured.
Summary
Proxmox VE is a versatile platform for managing virtualized IT infrastructures, supporting full virtualization with KVM and container virtualization. Integrating the LoadMaster solution with Proxmox allows users to achieve seamless virtualization management with reliable and scalable load balancing.
This guide explains multiple methods to deploy the LoadMaster solution on Proxmox VE, highlighting storage considerations and detailed deployment steps for different LoadMaster image formats. By following this guide, you’ll have your LoadMaster solution configured and ready to go.
Learn more about LoadMaster-supported applications here

Kurt Jung
Kurt Jung is a Senior Technical Marketing Engineer at Kemp Technologies. He works hands on with many technologies around application delivery and how to position these in today’s market. Kurt also works closely with key alliance partners to further strengthen the synergy. Prior to Kemp, Kurt has spent most of his career working as a consultant helping customers deploy on-premises, cloud and hybrid cloud solutions to support their business.
more from the authorRelated tags
Explore more articles
Kemp is part of the Progress product portfolio. Progress is the leading provider of application development and digital experience technologies.
Copyright © 2026 Progress Software Corporation and/or its subsidiaries or affiliates. All Rights Reserved.
Progress and certain product names used herein are trademarks or registered trademarks of Progress Software Corporation and/or one of its subsidiaries or affiliates in the U.S. and/or other countries. See Trademarks for appropriate markings. All rights in any other trademarks contained herein are reserved by their respective owners and their inclusion does not imply an endorsement, affiliation, or sponsorship as between Progress and the respective owners.