In this multipart series, we will look at how you can move your existing, self-hosted WordPress blog to Azure. While there are many ways to create a WordPress in Azure (Container, Web App, Windows VM or Linux VM), we will start with installing WordPress in a Windows VM (this article) and cover Linux VM and Web App options in other articles of the series.
In this article, we will move our blog to Azure VM running Windows Server. The process will require us to perform the following tasks:
- Create a Windows VM in Azure
- Install WordPress on VM in Azure
- Backup existing WordPress site content
- Backup existing WordPress site database
- Restore WordPress database
- Restore WordPress content
- Configure DNS
Create a Windows VM in Azure
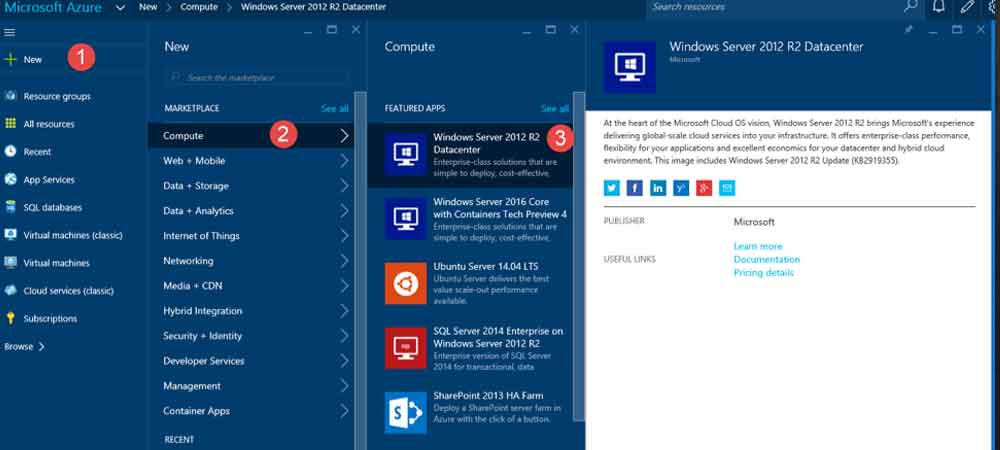
From Azure portal, Click “New”, select “Compute”, select Windows Server 2012 R2 Datacenter and click create. Resource Manager is default deployment model and is recommended:
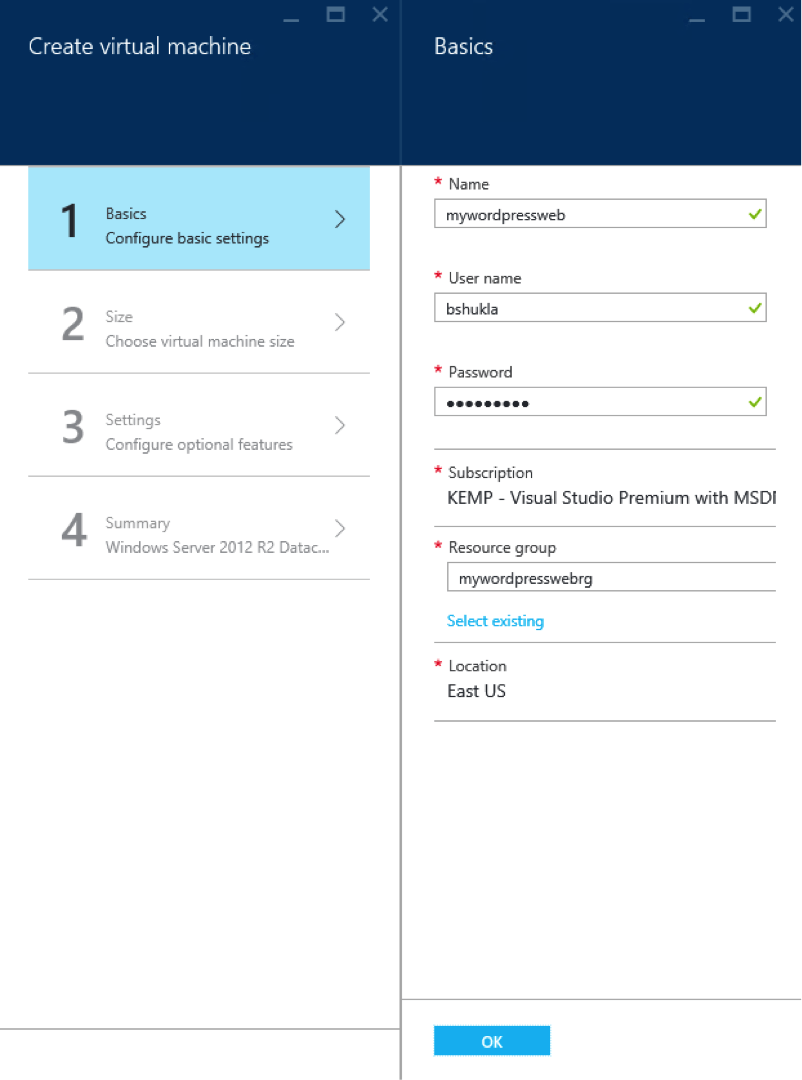
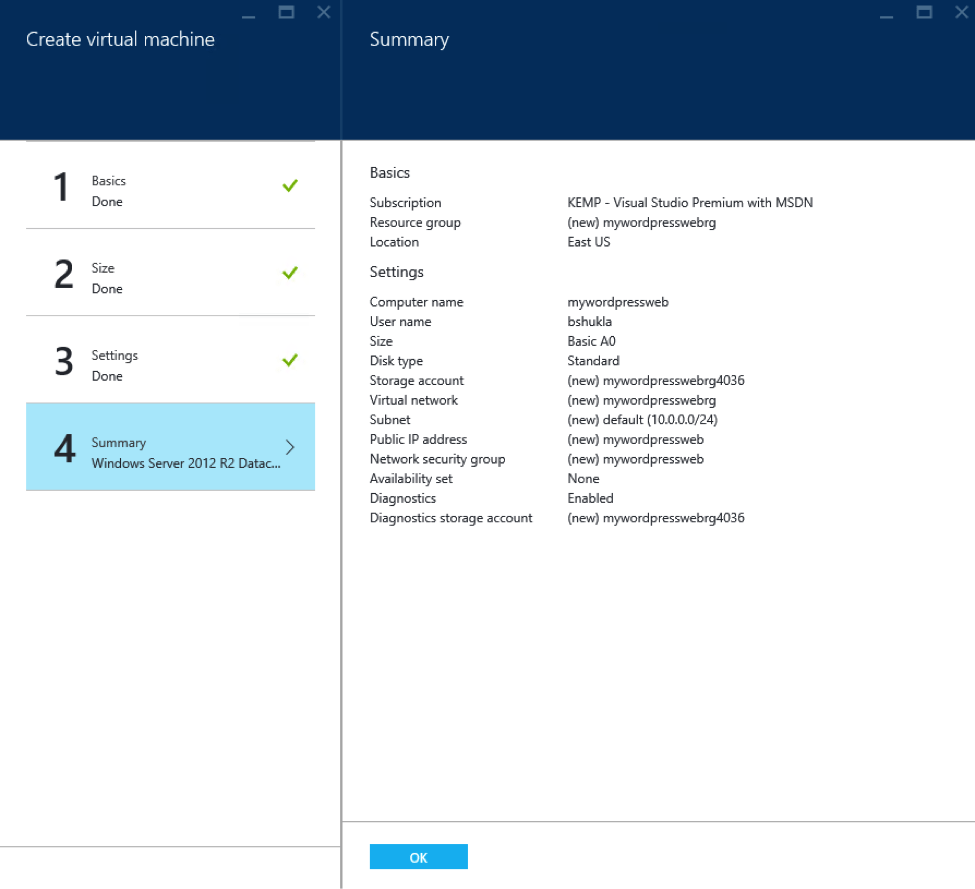
In resulting “Create Virtual Machine” blade, provide required information starting with “Basics”. If you don’t have an existing Resource Group in selected Azure subscription, you will need to create one in the process. Also pay careful attention to location. You may want to locate it closest to majority of your readership.
Next, select the size for your VM. This should be based on your resource consumption requirements. For my personal blog that draws little over 90,000 unique visitors per year, DS1 Basic VM has been pretty snappy, and a bit of an overkill. I am also not using all the features such as load balancing and auto scale that come with DS1 Standard instance. Pick your VM size accordingly so you don’t incur more cost that you need to.
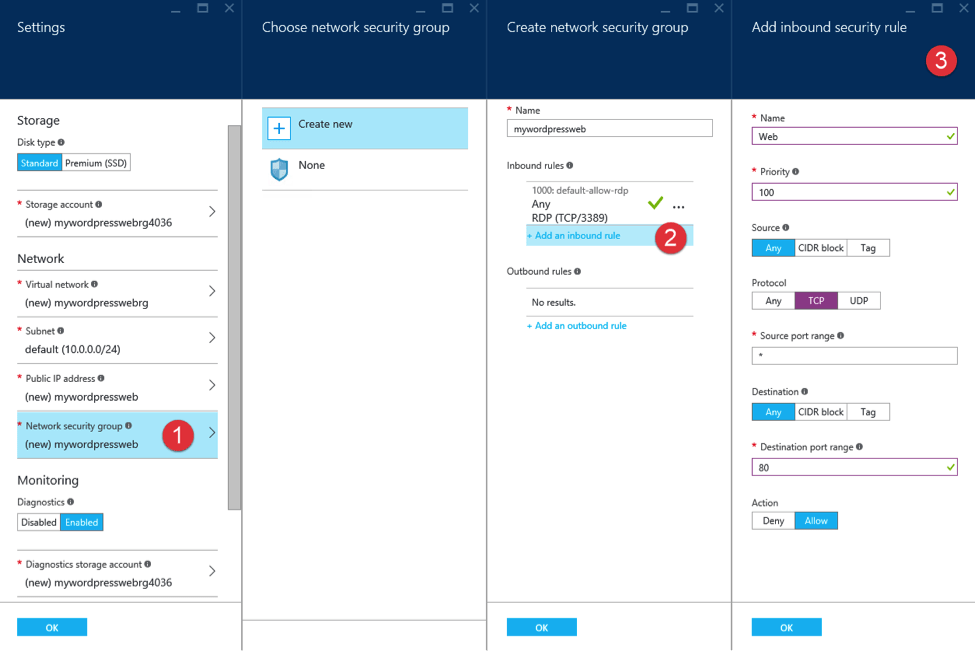
In most cases, you shouldn’t need to change most defaults but adjust them as necessary. By default, you will be assigned dynamic public IP address. For production web site, you may want to select static public IP address instead. Also, by default, only TCP port 3389 is allowed. Create a rule to allow TCP port 80 (and 443 if https/SSL use is planned).
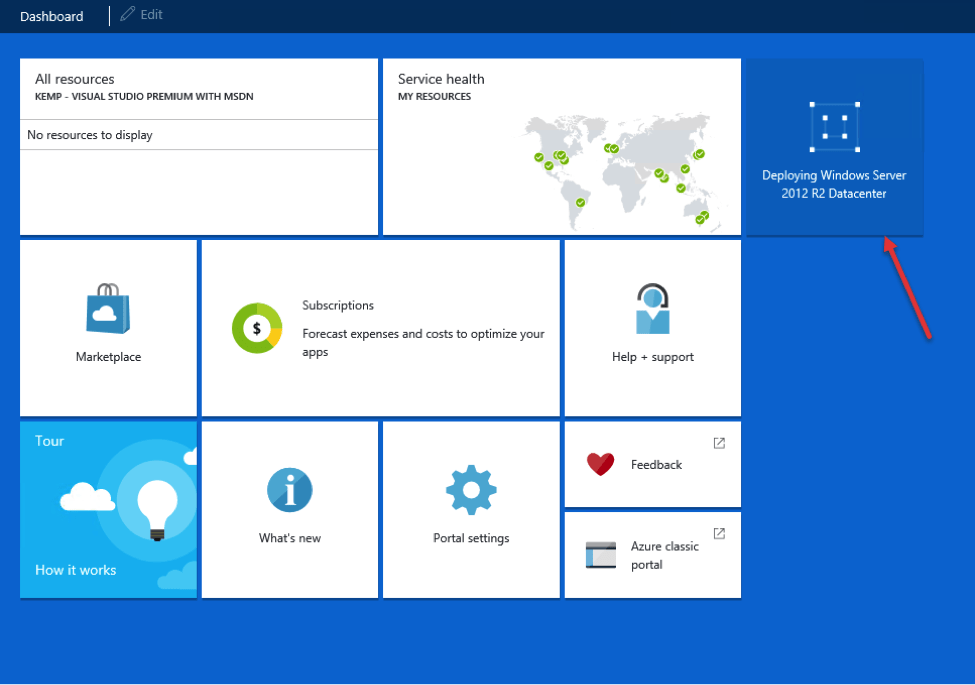
You can monitor progress of VM creation from dashboard:
Proceed to next step after VM creation is complete.

